My Sephora Wishlist!

Hey friends!

As promised last week, here’s my Sephora wishlist. Currently, all the products I’ve had my eye on are either clean skin care (since you all know skin care is about 75% of my beauty routine) and eyeshadows.

I’m not always one to branch out in terms of new products — if I love something I tend to repurchase it until the end of time. Honestly, If I had endless money to justify having like, 15 different bronzers, blushes, highlighters and foundations God knows I would — but I’d probably end up sticking to the same products for daily use anyways.

However, there’s some products that I find having a range has more of an impact — you know, things where colour comes a lot more into play such as lip products and eyeshadow. While I buy new lip products a lot more spontaneously, eyeshadow is a much bigger commitment for me — it’s so expensive and I don’t do crazy eyeshadow looks all that often, so it has to be worthwhile.

Anyways, enough with my rambling — here’s all the clean beauty and eyeshadow at Sephora I’m dying to try!

Neon Obsessions Palette in Pink
Credit: Sephora.com

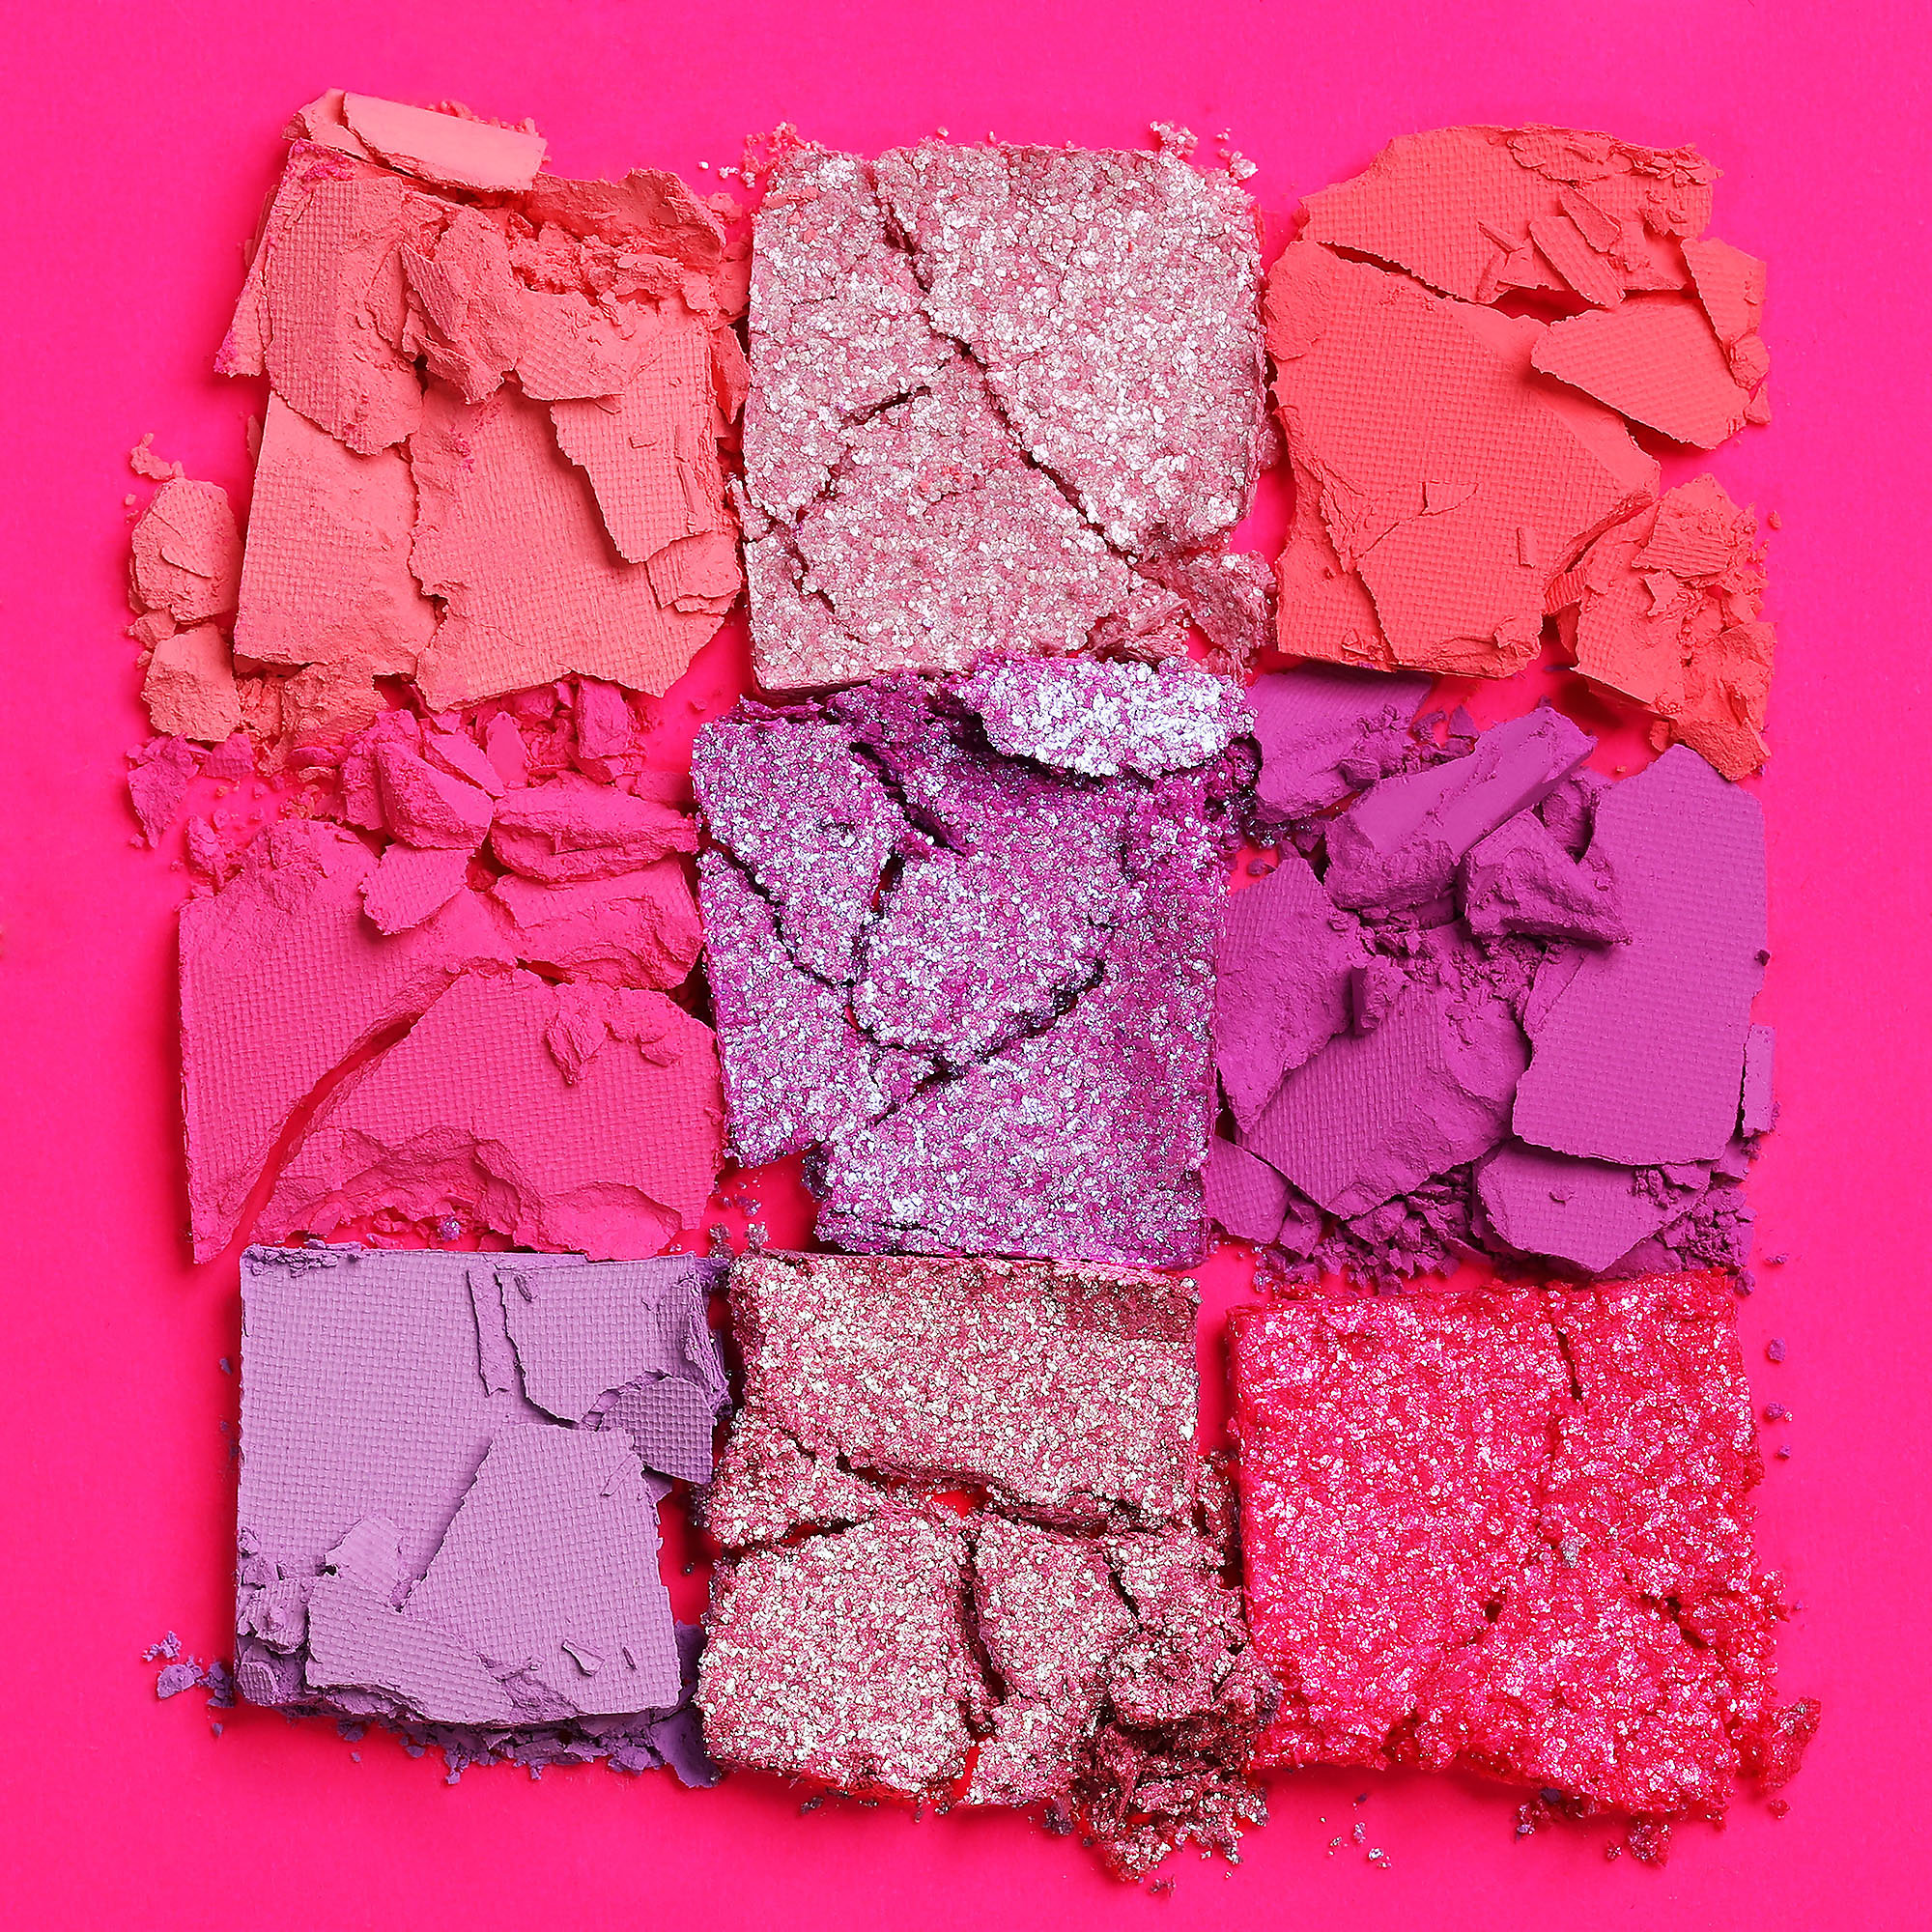
Okay, I’m really not one for crazy eye shadow looks — as much as I adore them, I find they often are challenging to execute (especially if I’m running late) and often look not so great on me. Even when I do experiment with eyeshadow, I usually stick to smoky or gold tones. That being said — this palette is GORGEOUS. If I ever was going to go totally crazy with colours, I’d definitely go for neon — and I love the shades in this palette. Even the two other colours in green and orange I’d be down to give a try. Plus I’ve owned some of the Huda Obsessions Palettes before (in Smoky, Topaz and Sapphire) and the pigment and quality of these shadows are amazing, don’t let their small size deter you. Find it at Sephora here!

Pat McGrath Labs Eyeshadow Palettes
Credit: Sephora.com

Okay, I’ve been dying to try out some of Pat McGrath Labs products since, like, forever. I’ve swatched a couple of their products at Sephora every so often and they are absolutely to die for. Seriously, everything from this line is just about the most high-quality product I’ve ever seen. However, at $170 per eyeshadow palette, it’s definitely a bit of a commitment. Fingers crossed I’ll get the chance to test some of these out soon, though. Find them at Sephora here!

Anastasia Beverly Hills Eyeshadow Palette in Soft Glam
Credit: @loveofburgundy Instagram

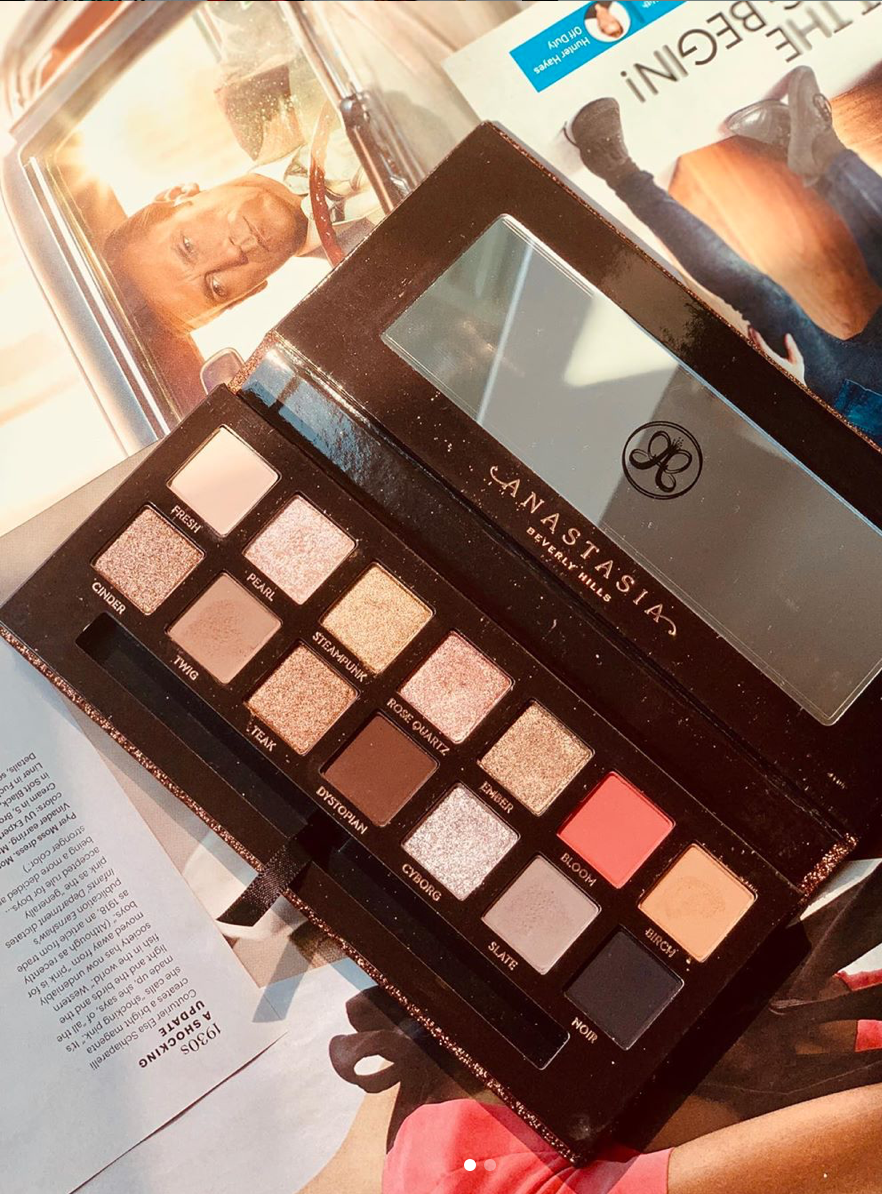
If you’ve been following me for a while you’ll already know I absolutely love ABH. I’ve tried out so many of their products and honestly? I’ve yet to find one I didn’t like. I’ve already tried out a number of their eyeshadow products in the past, but I’m dying to get my hands on the soft glam palette. I think the colours are just gorgeous, and have been super inspired by my long-time friend Erin to try out more of their eyeshadow collections. (BTW, you should go check her out! Her instagram is @loveofburgundy and it’s absolutely fabulous). Also, be sure to check out the product at Sephora here!

Like, Everything By Herbivore
Credit: @herbivorebotanicals IG

Herbivore is a brand that I’ve only recently been introduced to but absolutely ADORE. I haven’t yet gotten the chance to test out any of their facial products, but I have countless on my list for when I finally get the chance. In particular, I’m hoping to test out their facial oils — I love their whole “mix and match” concept. The Bakuchiol Retinol Alternative definitely has my eye as I haven’t tested out Retinol-based products in my skincare routine yet. As well, I’m certainly looking to give the Lapis Balancing Facial Oil, Phoenix Cell Regeneration Oil, and Orchid Youth-Preserving Oil a try! You can certainly count on me testing these out soon and I’ll absolutely update when I do.

Biossance Squalene + Marine Algae Eye Cream
Credit: Sephora.com

I really didn’t want to name an entire brand I’ve been hoping to try but let’s face it, I’d love to test out everything at Biossance as well. You guys already know I’m crazy about this brand and have seen amazing results from their products, particularly their Squalene + Vitamin C Rose Oil. However, as I’ve totally mentioned before, my under-eye bags have always been a huge concern of mine. While I’m currently loving the Dr. Brandt No More Baggage gel, I’d love to test this product out as well. Plus, Biossance has their own Phyto-Retinol Serum that I’d love to try as well — also featuring Bakuchiol which is supposed to reduce irritation. Check out the eye cream at Sephora here!

Have you tried out any of these products? If so, drop a comment below and let me know what you thought! If you guys have any products you love or are dying to try drop me a message since I’m always looking for new suggestions (as if my list of products to try wasn’t already long enough!).

Much love,

Meredith

Tuesday Favourites: August 20th

Remington Face And Body Epilator

Welcome back everyone!

This Tuesday, I’m starting off with a bit of a weird confession: I have never shaved my legs in my life. Not once.

That being said, I personally prefer to keep just about all my body hair removed — save for my lashes and brows, of course. (Side note: does anyone else feel like a totally new person every time they get their brows done? It’s one of my favourite feelings in the world).

So, basically, I’ve been waxing my legs my whole life. Since I’ve started waxing, I’ve kept up with it routinely — which for those of you who like smooth, hairless legs is a great way to go, as waxing eventually thins out your leg hair (or stops it from growing entirely!).

However, constantly going in for waxing appointments is time-consuming and expensive. Especially once I started high school, and especially in University, it just wasn’t realistic anymore. I tried out all sorts of other methods — Nair Cream, which I disliked for the smell and the irritation it caused me, as well as waxing strips, which I found to be an okay solution, but not phenomenal.

Which is where the epilator comes in.

Basically, if you’ve never heard of an epilator before, it’s a little machine that works as hundreds of tiny tweezers to fully remove your body hair from the root. It gives the same results as waxing, without the effort of heading over for monthly waxing appointments (or the costs!). I actually tried one of these out a few years ago, back when the technology was fairly new. At the time, I wouldn’t have really recommended it — it was an awfully expensive and clunky machine, and the hair removal job was just so-so.

However, a few weeks ago my friend Amanda asked me to grab her one of these off of Amazon and I was shocked by how cheap it cost — only $50, warranty included. For those of you keeping tabs, that’s easily the costs of two boxes of Nair Wax strips, or a couple packs of razors. The big difference here being — an epilator is a one-time purchase. There’s no refills or replacements, after you purchase it you should be good to go for a few years.

So I dropped two into my shopping cart — one for Amanda and one for myself. I was skeptical at first, honestly, since it was a fraction of the cost of the machine I’d owned in high school. How good could it really be? Luckily, when it arrived the next day, I found my answer: it blew the old tech out of the water.

This epilator painlessly and easily removes leg hair. It’s very gentle, and I’ve yet to have any sort of irritation come from using it — even with my sensitive skin. While I’m pretty unbothered by the pain of leg waxing by now, this hurts even less. To me, in fact, this machine doesn’t hurt at all. There’s no pinching, no ripping, just flawless, easy hair removal whenever you need it. Plus, like waxing, it’s upkeep is minimal — it doesn’t require any sort of daily upkeep that shaving requires.

If you’re like me, and enjoy keeping your legs smooth and clean-shaven, give this product a try! It may seem a little expensive up-front, but I swear if you’re buying razors or waxing it’ll save you money, time AND effort in the long run. If this sounds like the product you’ve been looking for, be sure to check it out on Amazon here!

That’s all for this week! Be sure to check in next Tuesday for more of my favourite products!

Much Love,

Meredith

Sephora Haul: August 18th

Samples At Sephora!

Hey everyone!

So, recently, I took a little trip down to Sephora (classic, I know). However, this time around I figured I’d do a little Sephora Haul post of everything I got and share with you some returning favourites, as well as some new things I just got to try out!

On top of all that, my list of stuff I want to try out from Sephora is both a) completely unrealistic to buy at once and b) expensive. I was going to include all the products I’m dying to try here before I got into my whole haul and realized that added my Wishlist was going to turn this into the longest post of all time, so stay tuned for that next week instead. I have a couple of products that caught my eye that I’m excited to try in the future — after I’ve used up whatever equivalent I’m currently using or when I can justify the purchase a little better. If you’ve tried any of them and have some feedback, good or bad, I’d love to hear it!

So, let’s get into it!

Returning Favourite: Tarte Creaseless Concealer!
Tarte Creaseless Concealer

I’ve tried out sooooo many concealers in my time, but this one is my personal favourite. I haven’t gotten the chance to make a Tuesday Favourites post about it just yet, but trust me, it’s coming. I suffer from some serious under-eye circles and while I’ve tried out many a concealer, none of them last all day and cover everything up like this stuff does.

New And Exciting: Biossance Squalene and Bamboo Deodorant!
Biossance Squalene and Bamboo Deodorant

Okay, maybe this is TMI, but I tend to be a pretty sweaty person and it’s the bane of my existence. I’ve tried out so many deodorants, from VERY all natural (read: Lush T’eo Deodorant, which sorry, I totally hated), to Dove aerosol spray, to men’s Old Spice (yes, seriously). While I usually go for Secret’s gel formulas (which are great since they don’t leave any obvious white residue) I sometimes find they don’t work all that well, especially around the end of the tube. On top of all this, I’d like to have something natural — we’ve all heard about the dangers of aluminum in deodorant, and since I’m a pretty frequent user, I’d like to limit the chemicals I’m applying daily. I saw this stuff at the checkout line and immediately grabbed it and threw it in my basket. Sephora offers a bunch of all-natural deodorants, but I love love love Biossance, so this one immediately caught my eye. Fingers crossed it works, I’ll be sure to update you all if it goes well!

Returning Favourite: Lilly Lashes (Miami)
Lilly Lashes in Miami

Y’all already know I love lashes, and I promise a post on Lilly Lashes is coming soon. While I’ve already done a post on my other favourite lash brand, Sephora’s Luxe Lashes, these ones are a favourite for totally different reasons. They still look pretty natural, however I don’t find them as easy to apply or as flattering as the Luxe Lashes. The big upside here is that these lashes can last forever. Seriously, they are so well made — as long as I don’t lose them I can use them forever. While I tend to spring for the Luxe Lashes for specific events as I do like their appearance just a little more, these ones are also stunning and make a great lash for weekly use.

New And Exciting: Farsali Rose Gold Elixir
Farsali Rose Gold Elixir

If you’ve ever seen an Instagram makeup tutorial, like, ever, you’ve probably seen Farsali elixirs before. They’re super popular amongst make-up influencers for application under makeup, or even mixed in, for a fresh and dewey look. I’ve never been ready to commit to a whole bottle, as I wasn’t sure it was really something I really needed — but I was always curious. When I saw this sample sized bottle, I knew it was the perfect opportunity to give it a try!

Returning Favourite: Tarte’s Lights, Camera, Lashes!
Tarte’s Lights, Camera, Lashes Mascara

Alright, you guys already know I love Tarte. This product has always been one of my favourite mascaras and frequently in my rotation. Mascara is one of those products that I actually switch up pretty frequently; I’ll admit I’m pretty married to most of my other makeup items and rarely stray from what I always buy. With mascara, however, I’ve always had a couple of favourites that I switch out, and I’ll try out new products that catch my eye every so often as they only last three months anyway. This one reigns as one of my favourites, as I find the brush a great shape and the formula pretty fantastic — as well as the added eyelash conditioning bonus. Be sure to stay tuned for a post on all my favourite — and least favourite — mascaras I’ve tried!

Returning Favourite: The Beauty Blender!
Blender Sponge by Beauty Blender

I won’t go too deep into this one since I’m sure most of you are at least a little familiar with it. I’ve never met a better makeup applicator, and have pretty much been married to this sponge since I bought my first one. I seriously can’t remember a time I’ve purchased a different sponge or foundation brush since.

New And Exciting: ABH Matte Lipstick Set!
Anastasia Beverly Hills Matte Lipstick Set

Anyone who knows me knows I have never been a matte lipstick gal. From the start of the matte lipstick boom a few years ago, through its peak, it was never a favourite of mine. While I tried to hop aboard the trend, I always hated the dryness of it, how it looked when it wore off and was re-applied, and even the look — I just never personally never found it attractive. (This, along with straying from the bold-brow and contour trend, was actually a huge turning point for me in learning that I don’t always have to follow what’s trendy and a product’s popularity doesn’t mean it’s what looks best on me). Through and through, I’ve mostly stuck to gloss or non-matte lipstick through the years until they started to finally come back in style this last year. However, I occasionally spring for the occasional matte lipstick — I find at least non-liquid matte isn’t as drying and doesn’t give as extreme of a matte look which I indulge in sometimes. This product (and the surprising low price of it) caught my eye near the checkout, and I decided to give it a try as most of the colours have a shimmer and the sample size of them is fairly low-commitment. I’ve never tried ABH Lipstick but the brand is one of my favourites, so I’m sure these won’t disappoint.

Returning Favourite: Hello Fab Coconut Skin Smoothie Priming Moisturizer!
Hello Fab Coconut Skin Smoothie Priming Moisturizer

Okay, this product’s name is a bit of a mouthful. But this stuff is fantastic — it can double as a moisturizer even when you’re going out sans-makeup and has a lovely glow to it that illuminates your complexion. My skin is generally on the dry side, so I find this product works wonderfully to give my skin a little extra moisture before I start my makeup routine. While I’m not 100% married to it like I am with many of my other products, I’ve used it consistently as a primer for about a year now.

Returning Favourite: Benefit Gimme Brow Mascara!
Benefit Gimme Brow Mascara

I won’t go too deep into this one since I already made a whole post about it here. However, if you’re one for a more natural brow look, brow mascara is a product worth looking into — it helps define your brows while also holding them in place all day. Plus when it comes to brows, Benefit is one of the best.

And that’s all for my haul! Stay tuned to read all about my wish list of Sephora products — I have so many things I’m dying to try and I’d love any feedback before I go out and purchase them!

As always, much love,

Meredith

BONUS: Inside look at the Farsali Elixir — I’m already in love!

Tuesday Favourites: August 16th

CoverFX Custom Enhancer Drops

Happy Tuesday guys!

This week I’m going to be covering one of the most versatile products I’ve ever seen: The Cover FX Custom Enhancer Drops. I had literally been dying to try these for YEARS, but always felt that they were something I merely wanted, but didn’t need. Finally about a month ago, I just decided to go for it. Can I just say? Best choice ever.

First of all, if you use these in the classic highlighter sense, they will give you the most blinding and fantastic highlighter ever. They blend with make up super easily too, making them easy to use and ensuring a natural glow. Plus, if you’re looking for something a little more natural and a tad less intense, it can be applied beneath foundation to really give that “glow from within” look.

But the best part is, they can be used for so much more. Not only can this product be used as a highlighter, it can be used as an eyeshadow, mixed with foundation or lipgloss for an added glow, or honestly whatever else your heart desires. It can be incorporated into just about any makeup look, and unlike other liquid makeup formulas, can blend well over powdered makeup as well.

This product has a serious shade range too. While I opted to get the shade “Sunlight”, I know I’ll be back to purchase other shades in the future. They have seven shades, ranging from holographic white to deep bronze, with shades of pink and silver thrown in the mix as well.

Seriously, if you’ve been thinking about testing this product out, GO FOR IT. It’s a little pricey, but a little goes a long way. I haven’t ever needed more than two or three drops, no matter how glowy of a look I’m going for, because it’s just that powerful. Try it for yourself, seriously, you’ll be sold on it instantly.

If you’re ready to glow like you’ve never before, check out the product on Sephora here!

Much love y’all,

Meredith

Get The Look: Fake Freckles!

Hey everyone!

So, today I figured I’d share a little tutorial: how to create a natural, sun-kissed freckled look. With the last few weeks of summer coming up, it’s time to take full advantage of the tanned summer look. While it can be nice to look super glowy and golden all summer long, many of us have busy lives and can’t afford to hit the beach every day. Plus, for those of us without freckles it can be a fun way to switch up your look! However, it can be tricky to make them look natural, hence the growing popularity of products to help mimic a freckled look. But with these easy steps, I can show you how to freckle your face with products you likely already have at home.

Step One: Do Your Regular Make-Up!

I do my freckles as the last step in my makeup, so to start your just going to do your makeup as usual. I find that freckles look waaaaay more natural on skin that looks naturally tanned (even if you’re super pale). The best way I achieve this is with bronzer. I usually start off with a matte bronzer (I personally use Too Faced Chocolate Soliel Matte Bronzer) and apply it all over my face and cheekbones using a large powder brush as I find it makes my other makeup blend more naturally.

Then, I take a shimmery bronzer (I like the use Hourglass Ambient Lighting Bronzer, it’s one of my personal favourites) and apply it to my cheekbones, temples and jawline with an angled bronzer brush. I find this works best if you go in lightly on your forehead/jaw. To make it look as natural as possible, be sure to blend your cheekbones right up into your ear.

Finally, and most importantly, I take some shimmery bronzer and apply it to my nose. If you’re outdoors a lot, your nose tends to tan more than the rest of your face as it sticks out under direct sunlight. So I find applying a bit of bronzer to your nose tip makes you look a little more naturally sun-kissed!

After this, I simply finish with matte pink blush as well as highlight. If you’re looking to warm up your complexion a bit, the blush can always be applied to your nose and temples as well! Additionally, I always highlight my cheekbones, top of my brow, nose tip and cupids bow. I find the nose tip especially important if you’ve applied bronzer to your nose to help blend it all together.

Step Two: Use Eyeshadow That Matches Your Skin Tone!

For the freckles themselves, I like to use eyeshadow to create the look. Once you’re done with the rest of your makeup, you’ll want to take a light, matte brown eyeshadow to create your freckles (similar to an eyeshadow you may use as a transition shade). For this, it likely depends on your skin tone, however I find a light taupe/neutral brown looks the most natural. As well, you may want to choose a slightly darker shade to help vary the colour and intensity of your freckles.

Step Three: Apply Freckles!

For this, you’re going to want to take an eyeliner brush and wet it. Simply dip it into your selected eyeshadow shade and start applying! Just patting on plenty of gentle dots I find works best for me. To get the most natural look, I find it works best to begin on the bridge of your nose and spread outward from there, doing your best to maintain a random pattern and going back in to fill in any sparse areas after the fact. As well, I find it best to concentrate on the nose, but also spread all the way past your eyes, being sure to keep them fairly high up on your face.

It’s important to keep your freckles light, otherwise they make start to look unnatural. If some of them are almost invisible/not perfectly circular, it’s okay! Ultimately no one will focus on each freckle individually and it will only help to heighten the natural appearance of your look. I personally have found its easier to pull this look off if the freckles themselves are almost barely there, rather than too in-your-face. As a final step, try to blend them out a little with powder or extra bronzer.

And just like that, you’re done! No freckle tattoos or stencils required. Finish with a setting spray to help your makeup last all day and go out there and show off your look!

Much love,

Meredith