My ColourPop x Animal Crossing Collection Unboxing!

Hey friends!!!

Soooo, it’s finally happening! From the moment I saw ColourPop announce their collab with Animal Crossing, I knew this post had to happen. For those of you who live under a rock or something, Animal Crossing: New Horizons quickly became all the rage just about this time last year when lockdowns began. With our lives and busy schedules pulled seemingly out from under our feet, immersing ourselves in an adorable virtual world with all kinds of stress-free tasks to take up all of our newfound free time was the perfect way to spend lockdowns. However, my history with Animal Crossing goes back even further — back to Animal Crossing: Wild World, which was my absolute favourite video game growing up. Seriously, I was obsessed with it (and frankly, still am. The only difference now, 10+ years later is that, for better or for worse, my mom can’t limit how long I play each day).

Basically, the point is when I saw ColourPop announce they were releasing this collection, I knew it was going to be absolutely perfect for me. I decided pretty quickly that I was going to buy the whole collection when it dropped, which is something I’ve never done before (both buying a whole collection AND buying it right as it’s released). And, of course, I couldn’t just test out the whole collection without sharing it with you all! So, without further ado, here’s my first impressions of the ColourPop x Animal Crossing collab!

What a Hoot Eyeshadow Palette

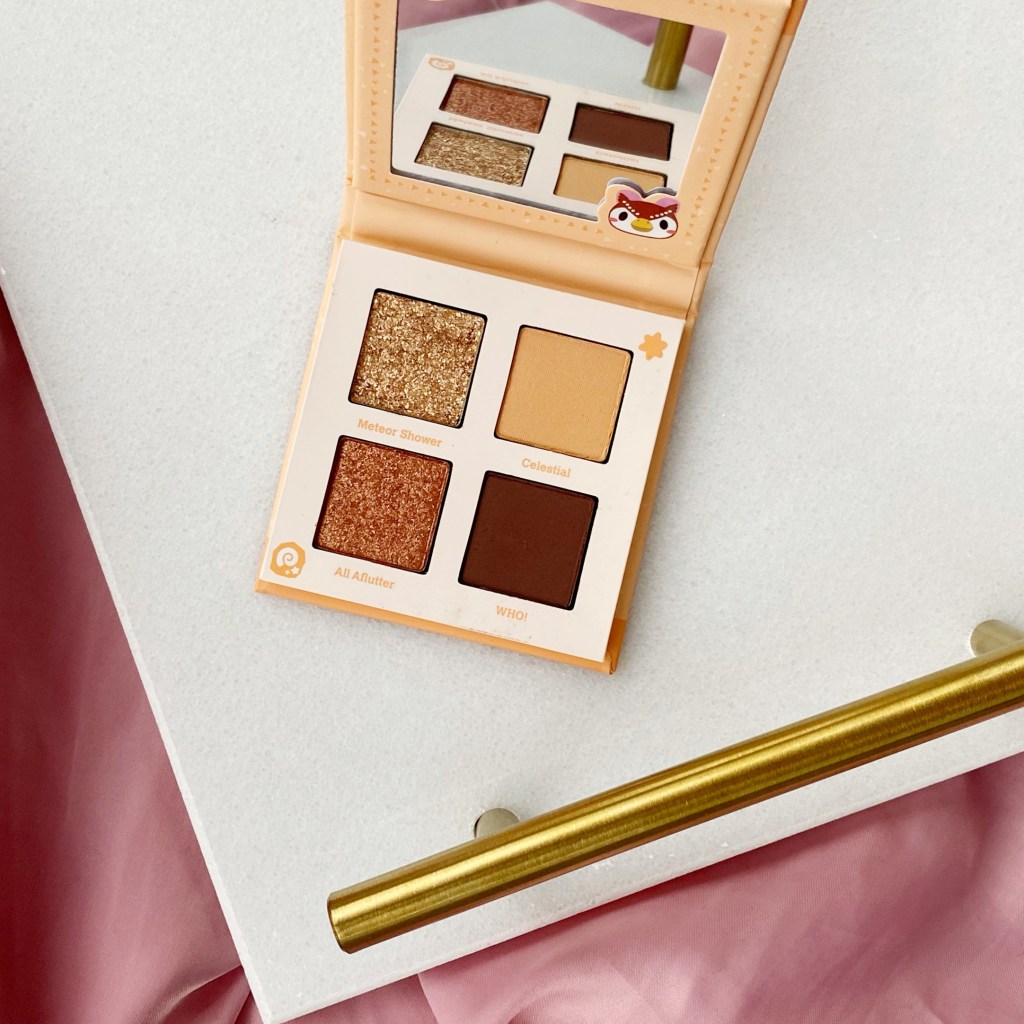
Ironically, I wasn’t the only one who knew I needed this collection in my life — my sister actually ended up buying this palette for me as well. (Which is fine, as it allowed me to give away the one I originally purchased for myself to my other makeup and Animal Crossing friend Erin as a gift!). This palette is definitely the most everyday-appropriate in the set of four shadow palettes (each of which, in turn, contains four different shadows). The orangey-brown and bronzes make it a great mix of colours that can be used to create an everyday OR bold night-out look. They’re all highly pigmented and blendable, as ColourPop shadows usually are, and in particular I love the shade Meteor Shower (top-left), which looks like a normal gold shade on the surface level, but has a stunning chunky-glitter look to it when you swatch it.

5 Star Island Eyeshadow Palette

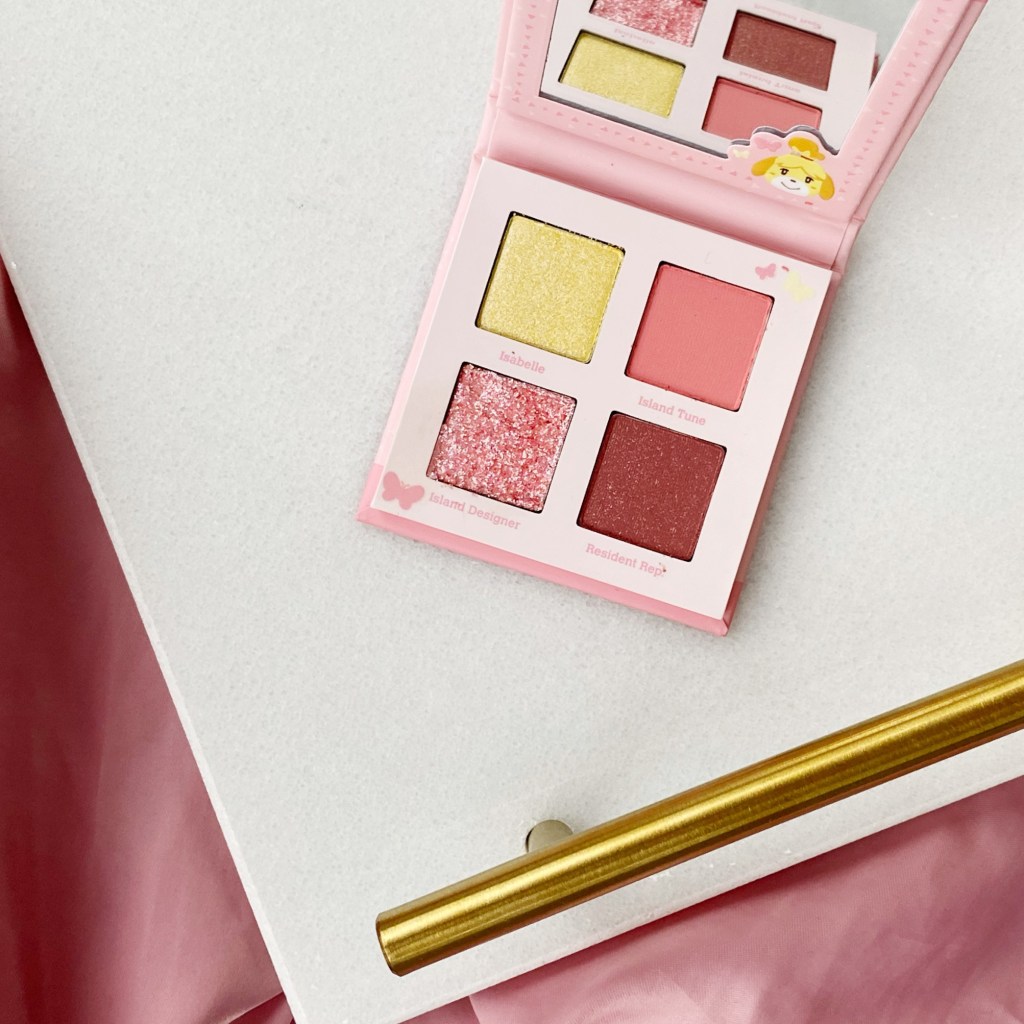
This palette is a super-cute, pink and yellow themed quad that not only has some colours that, to me and my personal makeup collection, are super unique — but I also feel that will be perfect for spring. I personally adore pink eyeshadow — it can be a tricky one because the wrong shade can end up making you look really tired — but it makes a really cute and simple every-day look when you find the right shades for you. For this palette, I’m particularly excited for the shades Isabelle and Island Designer (both on the left), as I’ve never tried out yellow eyeshadow before and the chunky pink glitter look is just so stunning.

Labelle of the Ball Eyeshadow Palette

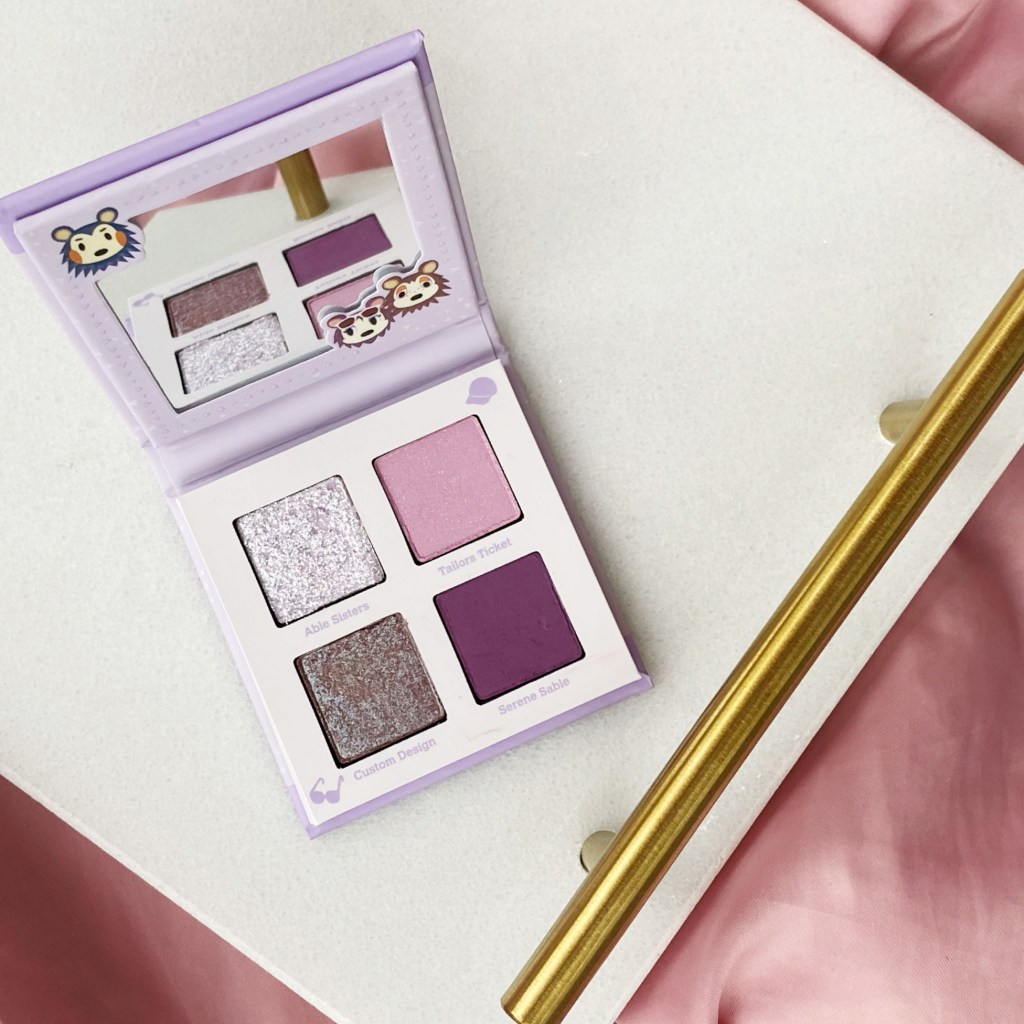
I was particularly excited about this shadow quad, as pastel purple is one of my absolute most favourite colours — both as a colour and as an eyeshadow shade. I was a little worried, since I already own the Huda Beauty Pastel Obsessions palette in both lilac and mint green that I was going to end up with shades that were similar to shadows I already own, but the shadows in both this palette AND the Nook, Inc. mint green palette are so unique that they’re different from any other shadows I’ve seen around. I really love all the shades in this palette, but particularly the chunky iridescent purple glitter and the darker duo-chrome shades Able Sisters and Custom Design (on the left of the palette) are incredibly stunning shades unlike anything I own that I can’t wait to test out.

Nook, Inc. Eyeshadow Palette

The fourth and final shadow quad in this collection is the mint green Nook, Inc. shadow palette. While the overall look this palette gives off is a minty-green tone, each shade is really different and overall this palette looks like it’ll help me create some really cool new looks this spring. In particular, I love the shade “Made in the Shade” (top right) which took me by surprise as it didn’t look the most interesting of the bunch in the pan. As well, the glitter shade CEO (bottom left) is such a pretty colour IRL — the photos don’t really capture what a complex glitter it is.

Balloon Pop Super Shock Shadow

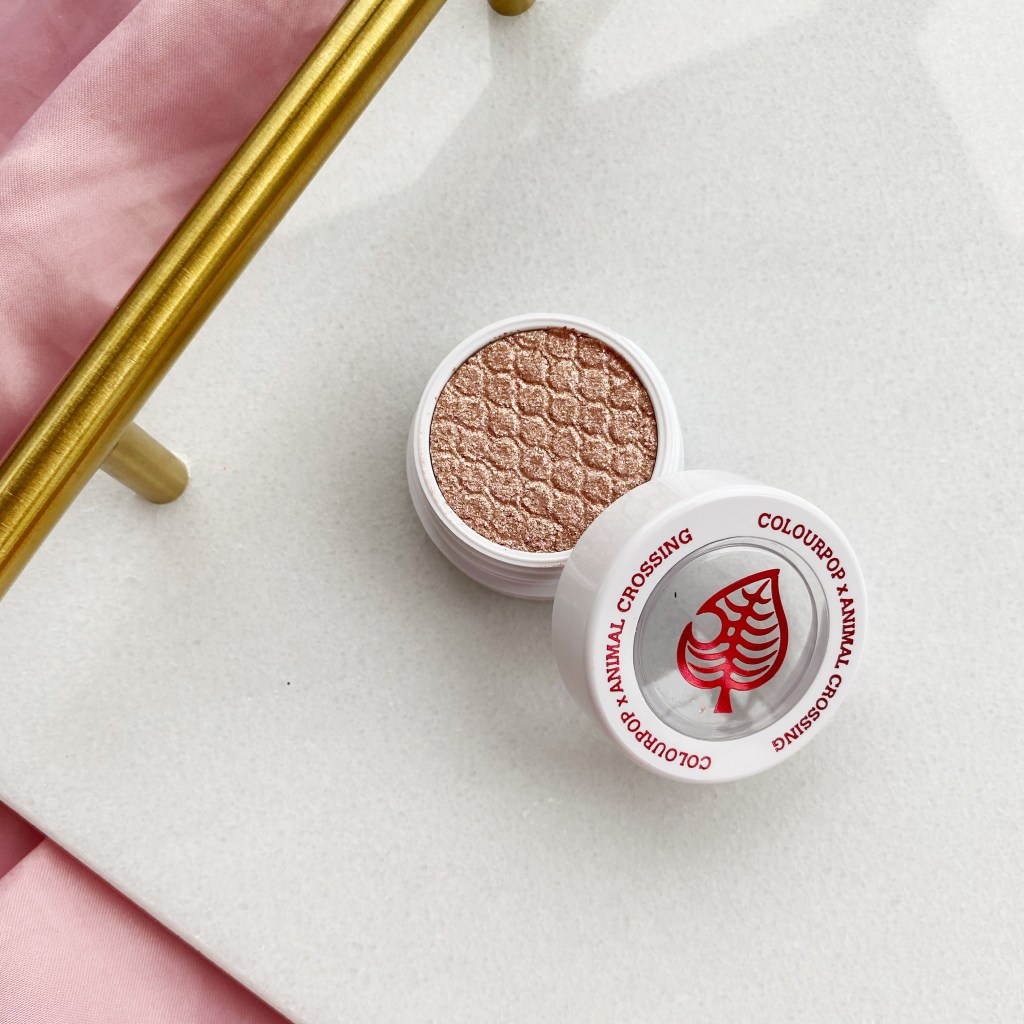
This collection, as well as offering the four shadow quads, also has one single super-shock shadow in a somewhat bronzey shade. The glitter in this shadow, however, is incredibly dimensional — it comes in a huge range of colours that add up to create the shadow’s overall bronze-hue. The effect of having such dimensional glitter shades in one colour gives off one of my fave effects in a shadow shade — the look that the shadow is so glittery and reflective, it’s almost like it’s wet. It just looks so beautiful and vibrant, and really creates a stunningly deep colour IRL that I can’t wait to try out and use more.

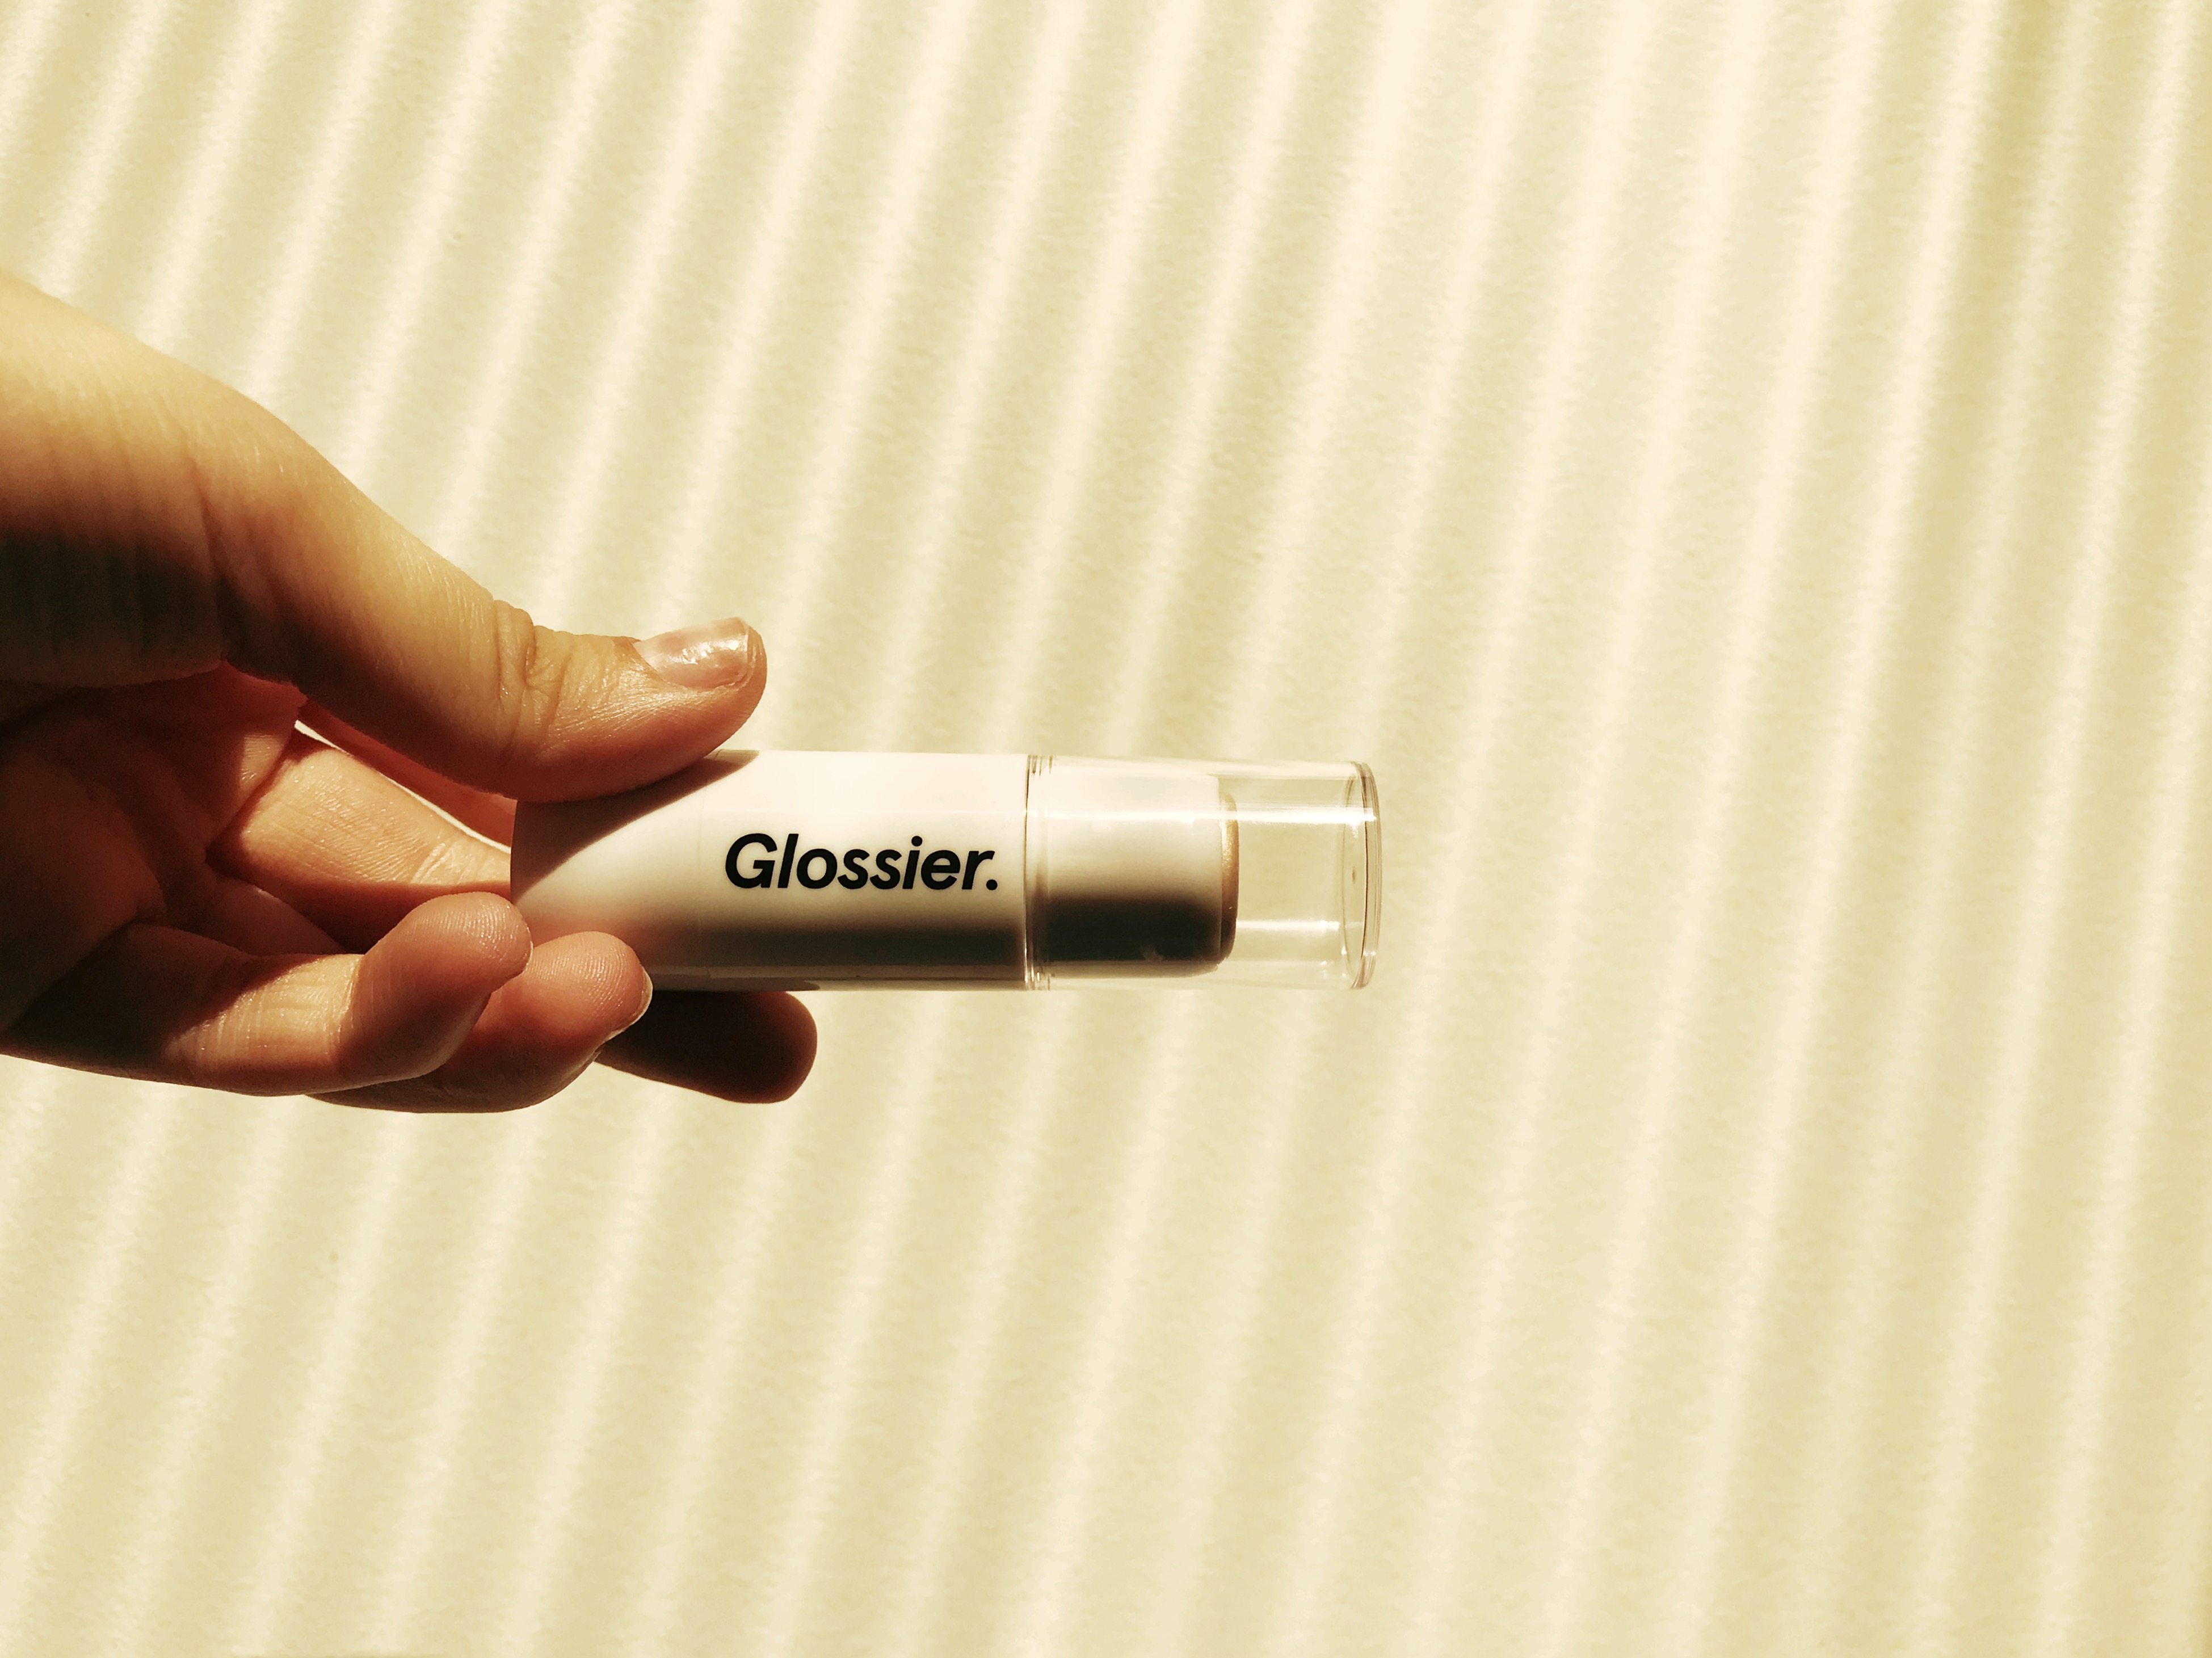
Bellionaire Glitter Gel

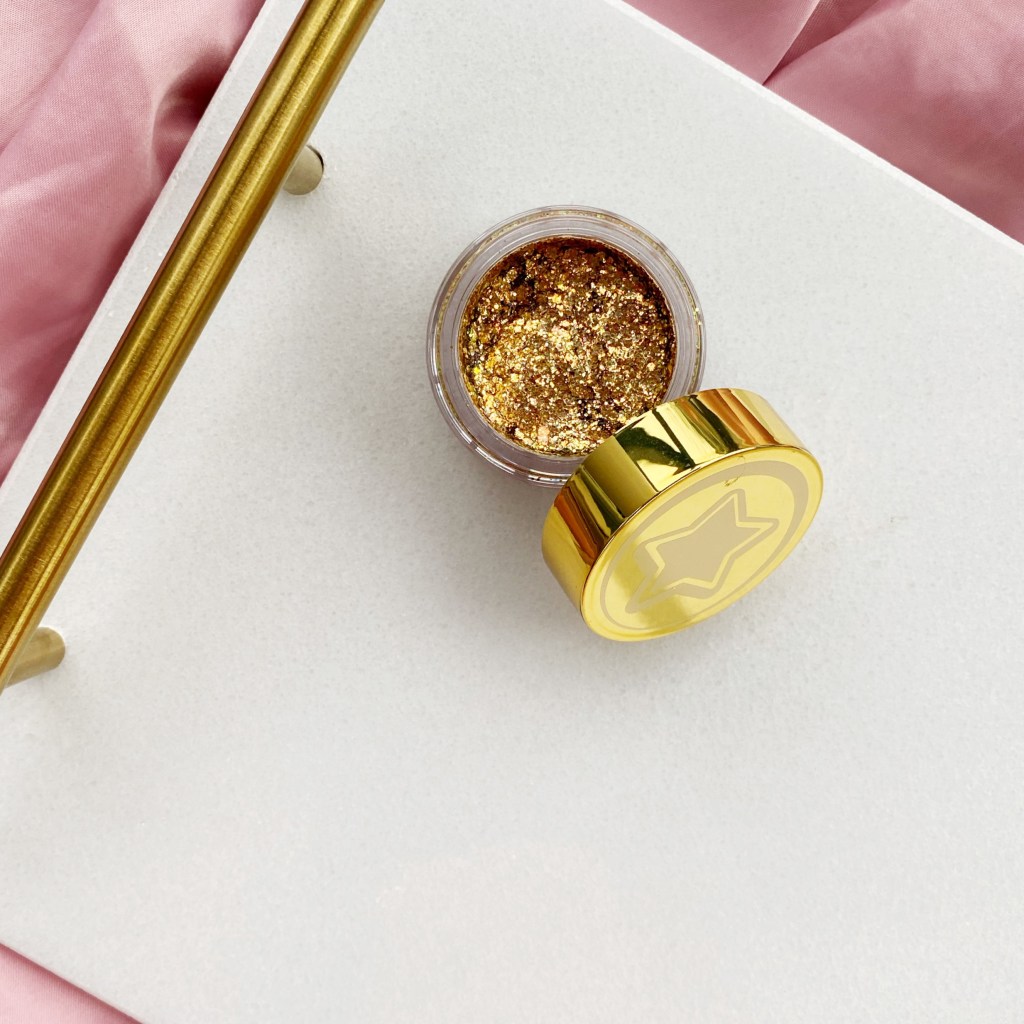
As you all already know, I’m kind of obsessed with ColourPop’s Gliterally Obsessed Glitter Gels. They make applying and wearing chunky glitter so EASY in a way that loose glitter just cannot ever compare to. This shade is pretty different than the Sailor Moon glitter gel I have — it isn’t as sheer, so it definitely appears a little darker on the skin. It gives off a beautiful golden colour, but it has a lot of depth, as well. Rather than just being plain gold, the glitter has a bit of a rainbow cast when the light hits it, which I think is absolutely stunning. I’m totally obsessed with ColourPop’s Glitter Gels, honestly, and I can’t wait to add even more shades to my collection.

Flower Power Pressed Powder Blush

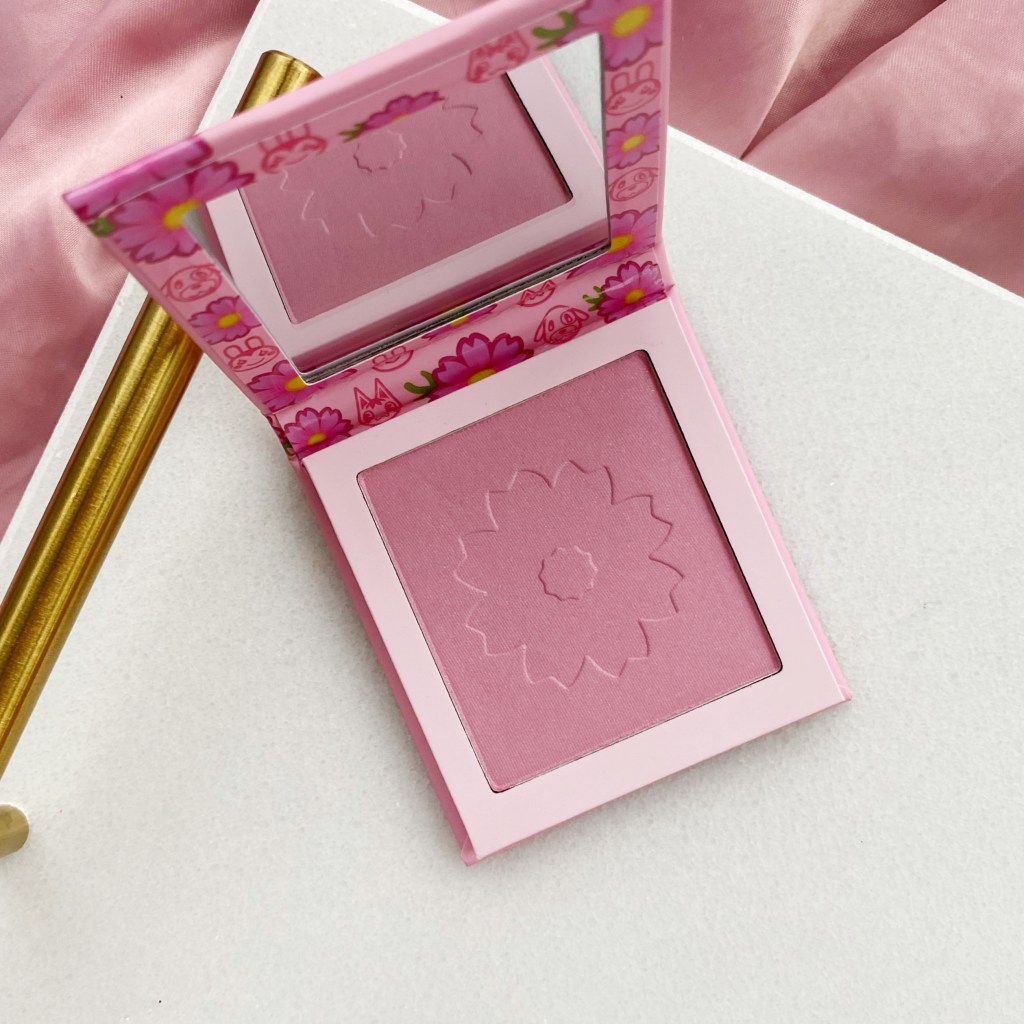
This blush is a super cute, dusty pink shade that could honestly be flattering on just about anyone. Blush is a tough one to create a universally flattering shade in, but I feel as though no matter what your skin’s undertones are that this blush would end up looking pretty damn good. It’s very neutral and delicate — it’s pigmented, but a very light shade making it easy to work with — and it has some darker pink glitter lightly sprinkled in to give it some extra depth that I absolutely adore. Overall, I’m really happy with this shade and I can’t wait to be able to experiment with it more.

Flower Tender Pressed Powder Blush

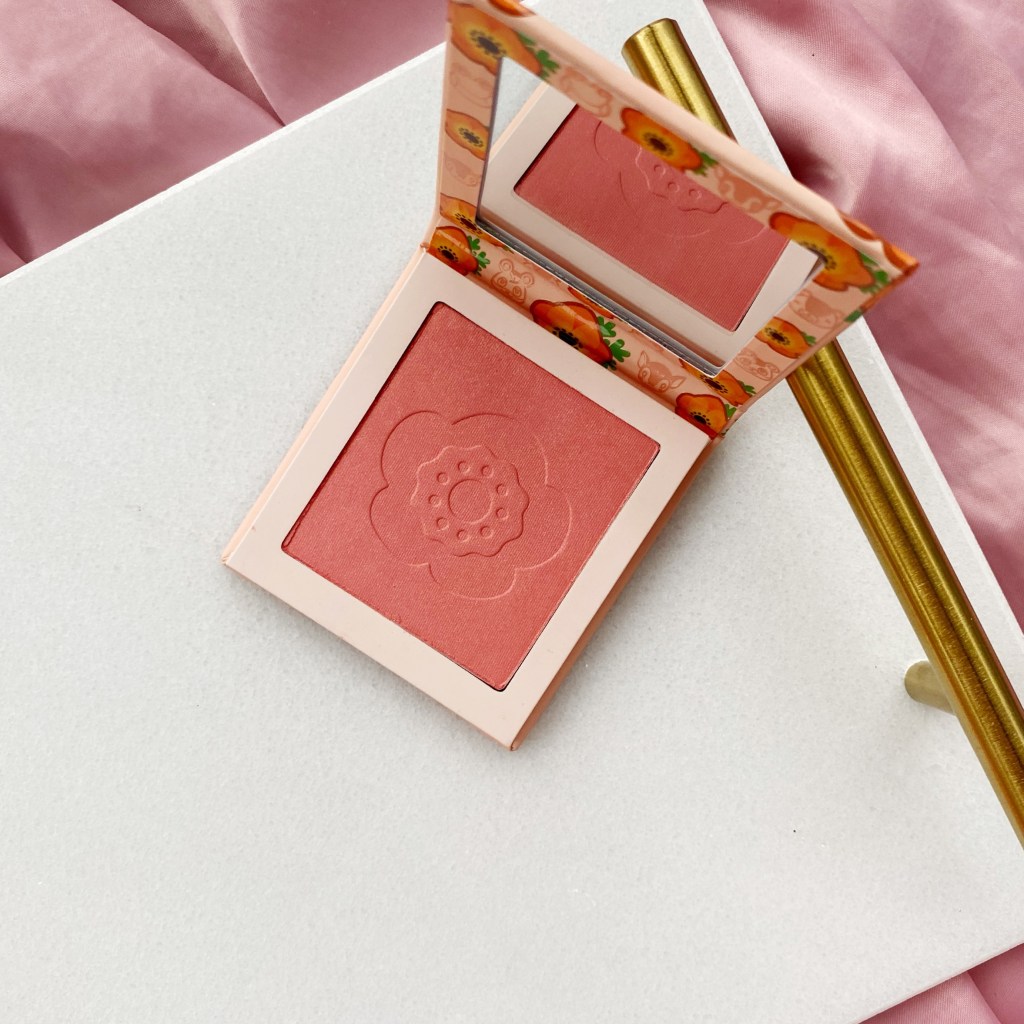
I’m particularly excited to give this blush a proper test run, as it’s completely unlike anything I currently have in my collection. I absolutely LOVE blush — after all, contour/bronzer/blush/highlighter really is my favourite part of doing my makeup — and lately, I’ve really become enamoured with super blushy makeup looks. All the blushes I have in my collection, however, are different varieties of the same pink hue — so while switching up which shade I use definitely has an effect on the overall look, it’s nothing as dramatic as going for a different colour all together. This shade, however, is completely different from anything I own — it’s a true coral, and way more warm and orangey than anything I’ve owned in a while. Experimenting with blushes can definitely be a challenge, as they really change so much of your overall look — but I’ve been looking to branch out more in my use and repertoire of blushes lately, and this is the perfect colour to add to my collection.

Fruit Basket Lip Tint Mini Kit

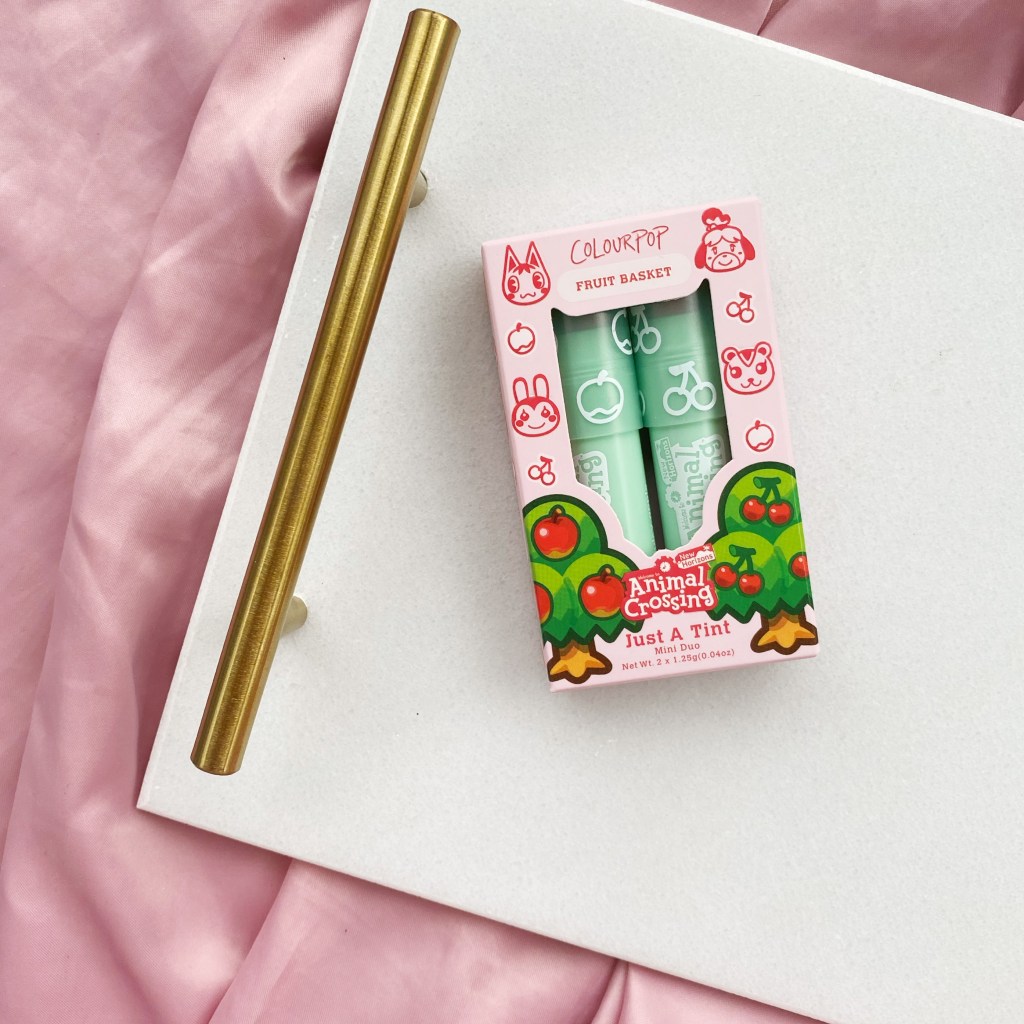
Okay, these lip tints are SO. CUTE. I really didn’t know what to expect when I purchased them, as I haven’t tried anything similar from ColourPop (or any other brand, really) to give me an idea of what this product was like. After all, I’m pretty dedicated to my lipgloss collection. While I was kind of expecting these products to essentially be a lipstick, I was pleasantly surprised to discover that ColourPop’s “lip tints” are essentially VERY pigmented lip balms. Basically, they end up being a very light wash of colour on your lips, making it look like they’re almost just the colour of the lip tint naturally. The shades from the “Fruit Basket” duo are both pink-ish shades, based on Animal Crossing’s cherry and apple trees, and both colours essentially make your lips just look naturally pinker, even, and soft. I’m kind of in love with all of the lip tints I received, but I’d definitely say that this duo is the most universal of the three, and the safest bet if you were looking to try these lip tints out for yourself. However, since these kits are more of a “tint” than a lipstick, they’re really versatile and I think it would be hard to go wrong with any of the duos, honestly.

Fruit Roots Lip Tint Mini Kit

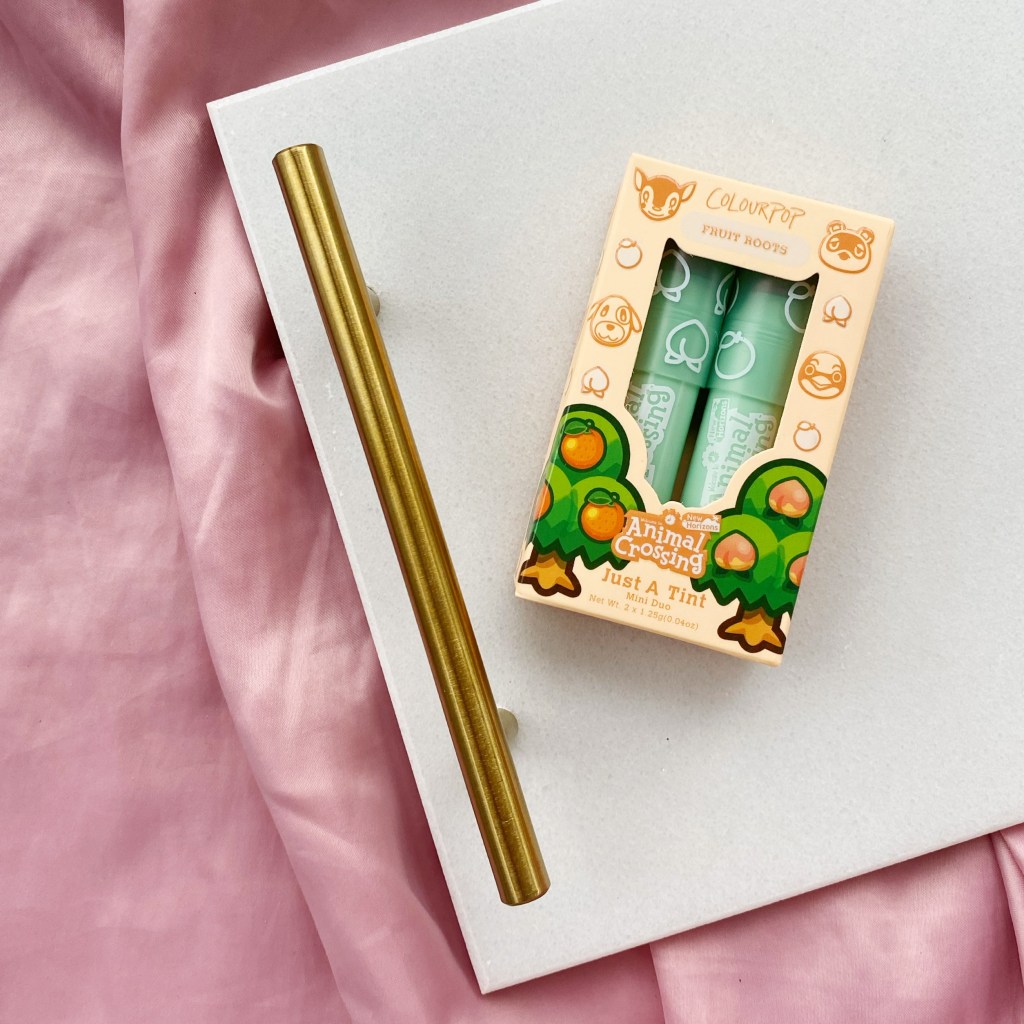
The second dup in the bunch is based off of the peach and orange trees in the Animal Crossing game universe. These are super fun, more peach and coral-based tones, that I also think would pair with the “Flower Tender” blush in a beautiful way. After being really obsessed with coral shades back in high school, I kind of avoided anything even vaguely orange-looking in makeup for years, but it really is a fun and summer colour and I’m really happy to be able to experiment with it more and add it back into my collection. These lip tints, again, aren’t crazy dark — so it’s a good way to experiment with colours I wouldn’t normally use without it being too intense. (As well, all of the lip tints smell like the fruit they represent in the game — which only makes them that much more fun and adorable!).

Pick of the Bunch Lip Tint Mini Kit

Honestly, I was a little nervous before trying these shades out — they were the one item in the collection that made me consider not buying it as a whole. Brown and neutral shade lipsticks aren’t really my thing, not only in terms of my personal style but also in terms of how well they suit me. The dark brown and neutral shades seemed like something that probably wouldn’t end up looking so great on me — in particular, the darker shade was the one that caused me the most concern. However, since it was cheaper to buy the entire collection as a package deal, I just went for it — and I’m honestly pretty happy I did. As I’ve mentioned, these lip products are more like very tinted lip moisturizers — they help make my lips feel super soft while adding a nice, sheer colour to them. There are two shades — a darker colour, based on Animal Crossing’s coconut palm trees, and a lighter shade, based on the pear trees in the game. The dark brown shade, as it turns out, didn’t end up looking like I was wearing dark brown lipstick — as well, the colour isn’t purely brown, but has some dark cherry red hues to it. As a result, it ends up looking more like a nice, dark red tint — the colour specifically reminds me of how your lips look after you eat too many cherries. I’ve actually ended up loving these shades, and I’m really glad I ended up purchasing them as they really took me by surprise and ended up being super cute and completely unlike any other shade or lip product I already have in my collection.

If you, like me, are a big enough fan of Animal Crossing to purchase this collection for that reason alone (or, you know, you saw something in this review that caught your eye), you can check out the entire collection on ColourPop’s website here! They just restocked the collab pretty recently, so most of the products are available right now. If you haven’t tried ColourPop out for yourself, I couldn’t recommend it more! Not only is their makeup pretty consistently good quality, but it’s affordable — whereas a large palette may cost anywhere from $12 to $24 — a palette of the same size would end up costing you about $50 – $100 from the average brand carried at Sephora. So if you’re looking to expand your collection and stick within your budget — ColourPop is a great place to check out.

Happy Sunday, everyone, and a very happy last day of February! Can you believe it’s actually going to be March tomorrow? I really can’t wrap my head around it, but after all — time really has no meaning anymore since COVID lockdowns began in March of last year. (I still laugh to myself when I think about how different it all seemed back then — I really thought that lockdowns would last for two weeks, or maybe three at most — and look at us now! What a weird year it’s been.). However, I’m hoping to really make the most of spring this year and set some good goals to keep me motivated, active and moving forward in order to put the last year behind me. As well, I already have some exciting posts planned for you all next month — including my Spring 2021 FabFitFun unboxing — so stay tuned!

Much love,

Meredith

Holiday Gift Guide #4: Makeup Edition!

Hey y’all!

December is officially under way and the holidays are going to be upon us before we know it. It’s easy to fall into the trap of getting pretty stressed out around this time of year — there can be a lot of pressure leading up to the holiday season, and it can be a crazy busy time for all of us and the year comes to an end. However, the holidays really shouldn’t be stressful — they’re supposed to be a time of joy, after all! — but ya know, sometimes that’s easier said than done.

It’s particularly easy this year to let the holidays sneak up on you before you even realize what’s happening, leaving you unprepared. After all, what even is time anymore in COVID? Do any of us truly know what day it is? Probably not. So if you haven’t completed your shopping yet, don’t worry — you’re definitely not alone. Cut yourself a little slack — it’s been a crazy year. If you’re still needing to get some shopping done and are in need of some ideas, I have you covered. Almost every item on this list is good for all makeup users, regardless of skin tone or skin type. As well, all these items can be found at Sephora, which tends to ship pretty quickly (within Canada, at least), so you’ll have plenty time to pick out some items and get them shipped and ready. (And of course, if the person you’re buying gifts for isn’t super into makeup, you can always check out my previous gift guides on Self Care, Skincare, and Lifestyle!).

Urban Decay All Nighter Pollution Protection Setting Spray

I figured that I’d start off with a product that truly would work for anyone on your list, regardless of their skin tone, skin type, or preferences. This setting spray by Urban Decay is a total classic, and one of the best products I own. One coat of this stuff, and your makeup will not move even a bit all day. Not even a little. It won’t fade, smudge, or wear off in areas that are oily or even high-contact (ie. under your mask). This stuff WORKS. Plus, it can be universally gifted to anyone who wears makeup — they’ll be sure to love it.

Sound like the perfect gift? Check out this product online at Sephora!

Huda Beauty Obsessions Palettes

Obsession palettes was a super fitting name for this product, because I’m completely obsessed with them. These palettes come in a wide variety of colours and themes, from neon, and pastel, to nude and jewel tones. These palettes are nice and pocket sized, making them great for compact makeup collections or travel — but don’t let their tiny size fool you, they pack a lot of pigment, making them last endlessly. These are some of my favourite eyeshadow palettes that I’ve ever owned, and I couldn’t recommend them more as a gift.

Sound like the perfect gift? Check out this product online at Sephora!

Stila Stay All Day Liquid Eyeliner

Stila’s liquid liner is, IMO, the penultimate liquid eyeliner. This liners been my go-to since high school, and it’s never let me down. This liner is SUPER pigmented, and comes with a solid felt tip that makes it easy to apply. Seriously — this liner comes out in the blackest black I’ve ever seen an eyeliner come. For any winged liner fans in your life, this liner will make the PERFECT gift.

Sound like the perfect gift? Check out this product online at Sephora!

Milk Makeup Hydro Grip Primer & NARS Pro-Prime Eyeshadow Base

This is another gift that’s pretty universally good for any makeup lover in your life, regardless of what they’re into or they’re skin tone/skin type. Makeup primer is something all makeup users likely use, and if not — they might like to give these a try! These are, hands down, the two most effective primers I’ve ever used in my life and I could not recommend either of them more. Milk Makeup’s Hydro grip primer is hydrating, lightweight, and provides a smoothing effect. Most importantly — it holds your makeup in place ALL day (even under a mask!). As well, NARS’s Pro-Prime shadow base is the only shadow primer I’ve ever used that holds your shadow perfectly in place for hours on end — it doesn’t crease, smudge, or fade (and I’ve accidentally fallen asleep with it on before). These both will make great gifts for any makeup lover you’re looking to spoil — no matter how picky they are.

Sound like the perfect gift? Check out Milk Makeup’s primer and NARS’s shadow base online at Sephora!

Kaja Mochi Pop Bouncy Blush

This is a product I tried recently and totally fell in love with. This little cream-powder blush is easy to apply and makes a great everyday, simple-look blush. It’s cute, shimmery, and has a super-unique formula so that, contrary to other cream blushes, doesn’t stay sticky or need to be set the same way. Even if you have someone on your list that isn’t crazy into makeup that you’re still needing a gift for, this blush makes a great addition to any simple, every-day makeup collection.

Sound like the perfect gift? Check out this product online at Sephora!

Hourglass Ambient Lighting Powder

This is another product I tried recently and was blown away by. I’m a big fan of the “dewey” makeup look, so I love adding in a little shimmer wherever I can. This finishing powder is meant to be applied over your face (or just areas you’re hoping to add a little extra glow to) after you’ve finished your makeup to add just a little extra shine. It really adds just a small shimmer, so you won’t look shiny or oily, but just a little dewey — and it makes my makeup look even more flawless and natural, IMO. It comes in a couple shades, but it isn’t like foundation where you’ll need to know someone’s skin tones/under tones to buy a perfect match — especially since it is so sheer. If you have a dewey/natural makeup lover in your life who’s always looking for a little extra glow, I could NOT recommend this finishing powder more.

Sound like the perfect gift? Check out this product online at Sephora!

Fenty Beauty Gloss Bomb Universal Lip Luminizer

Is there a soul out there who’s tried Fenty’s Universal Lip Luminzer who HASN’T loved it? Seriously, this stuff is the best and I’d own it in every shade if I could. Fenty Beauty is so high quality and made to have products that are flattering for all. The original and light pink shades of this gloss are classic shades you can’t go wrong with, and the two clear shades look like they’d be a fantastic addition to any collection (I’m hoping to get my hands on them myself!). These glosses are long-lasting, and they don’t bleed into your skin at all. 10/10, would make a fantastic gift.

Sound like the perfect gift? Check out this product online at Sephora!

Sephora Luxe False Lashes

This last one is a great for any lash-lovers, or any makeup users who’ve been wishing to test out lashes but don’t where to start. These lashes are the BEST, most realistic lashes I have ever used. They’re fluffy and beautiful, plus they come with a clear strip that’s very flexible — making it work well with all eye shapes. I find that these are great beginner lashes, since they have such flexible strips and fit so easily along your lash line. Honestly, if my lashes could look like mine do when I’m wearing these 24/7, I’d be the happiest I’ve ever been.

Sound like the perfect gift? Check out this product online at Sephora!

And that wraps up this year’s gift guide! I hope that you’ve all enjoyed it — I really put in a lot of effort putting this together for you all this year. Hopefully you’ve all got good, safe, socially-distanced plan for the holidays this year — whether that means with the family under your roof, your SO, your roommates, or even alone. Hopefully, along with this online list of gift ideas, you’ll be able to stay home and safe this holiday season.

Sending you all so much love right now! I have a number of exciting posts planned out for you over the final weeks of 2020, so stay tuned for that! I have a number of posts lined up, from a FabFitFun unboxing, to a little round up of 2020, a look back at 2020 and my very first ever ColourPop haul. I’m so excited to share them all with you, and I hope you’re all just as excited to read them!

Much love y’all — please stay safe this holiday season!

Xo,

Meredith

Mask-Friendly Makeup Tutorial!

Hey friends!

Can you believe it’s almost the end of August? This year has absolutely been flying by — its crazy to think back to how different things were even a month ago, yet alone back at the beginning of this year. One of the biggest changes to our world this year is requiring (and possibly normalizing) wearing masks in public. Wearing masks in public has been popular in many countries for years as an act of courtesy if you’re feeling sick, and while it wasn’t entirely uncommon in Vancouver, going forward I think it will become more normalized than ever.

Personally, I’m all for it. If you’re feeling sick, it’s only polite to protect others and limit spreading illness. I don’t find wearing a mask to be that much of an inconvenience, plus, you can get some pretty cute and custom ones to complete your outfit and express yourself! You can find all kinds of different masks anywhere nowadays, but for really unique designs and essentially unlimited options, RedBubble has you covered — I’m waiting on an order of masks I put in from them recently and I couldn’t be more excited! They really have something for just about anyone, given how many artists are active on the site.

The only things I find tricky about masks are 1) wearing them with glasses (which of course, I can always just wear my contacts — but it’s a pain if I don’t want to) and 2) wearing them with makeup. While you can get away with wearing a full face of makeup under a mask if you’re only wearing it for a short period of time or are careful not to exert yourself too much (and you know, end up fogging up the inside of you mask) — you really can’t get away with wearing a full makeup look if you have to wear the mask for a while. It’s pretty much impossible to not have your makeup get at least a little messed up under there, especially when you’re wearing foundation and a full cheek look. It’s impossible to keep your mask from wearing away your makeup when wearing it long-term, which can leave your makeup looking pretty rough after a while.

So, yeah. Masks can be a bit of a pain. But what’s a little inconvenience in the grand scheme of things? It may be a pain, but it’s better than the alternative of spreading disease and accelerating the pandemic. While you can easily choose to go makeup-free, I’ve also come up with a simple makeup look that’s a lot less prone to smudging under your mask for anyone who’s determined not to let their masks stop them.

I’ve found, personally, the trick to having your makeup stay relatively intact under a mask is to forgo foundation. I know this probably sounds unappealing to a lot of people, especially if you were looking for a tutorial to maintain your makeup under your mask exactly as you wear it normally. Sure, you may have to go a little more ~au natural~ for this look, but it still ends up looking like a full face in the end.

Step One: Prime

This is the first step to most people’s makeup looks, but given the mask (and thus the increased likelihood your makeup is going to wear off over the course of the day), it’s more useful than ever. I’ve been using (and loving) Milk Makeup’s Hydro Grip primer, however, whatever your go-to is works best for you!

Step Two: Conceal + Set

Next up, dab a little concealer of your choice underneath your eyes. My holy-grail under eye concealer is Tarte’s Creaseless Concealer, but once again — whatever your favourite concealer is works perfectly as well! I apply my concealer under my eyes in a triangular shape, and then blend it as best I can into my skin. The line between concealer and your face doesn’t have to be flawless — blending that out comes next. However, you’ll want to get it as diffuse as possible. Once you’re done, use a powder to set your concealer and keep it locked in before moving on to the next step.

Step Three: Bronze + Blend

Once your concealer is set, take a matte bronzer and apply it all over your face. Try to choose one that’s a more natural shade and isn’t too dark compared to your skin tone (this way, you’ll avoid turning out orange). You don’t want to use too much — it’s more meant to give you a little glow and blend the line between your concealer and your skin rather than acting as foundation. Make sure to get your eye area, too — you want it to look uniform with the rest of your face, after all! My go-to is Too Faced’s Chocolate Soleil Matte Bronzer — I haven’t made a whole post for this one yet since I’m waiting to finish and repurchase it, but it’s one of my faves. (After all, I want it to be all shiny and new and looking it’s best when I show it off to you guys!).

Step Four: Blush + Highlight

This step is kind of up to you, and whatever you want your finished look to be. If you need to blend your concealer a little more, you can add some more bronzer to your cheekbones. If you want to look fresh and glowy, feel free to add a little highlighter to the look. And if you want a cute and rosy glow, throw on some blush! It’s really up to you. I’d recommend keeping it as natural looking as possible, though — since this is where your mask sits, it’s the more prone to getting smudged throughout the day. Whatever you end up going for, be sure it won’t be too noticeable if it ends up being wiped away.

Step Five: Eyes

This step is totally up to you — feel free to style your eyes however you please! Whether you’re just looking to stick with your go-to everyday eye look, or go big and bold, or stick to simple and natural — the choice is yours! De to the natural look of this makeup, I like to stick to something simple and light — which I love the Charlotte Tilbury Pillowtalk Instant Eye Palette for.

Step Six: Set + Complete!

For the final step, you’re going to throw on whatever finishing touches you normally add and finish up with a setting spray! My go-to, of course, is ran Decay’s All Nighter Pollution Protection. This step is pretty crucial, since it really helps to hold everything in place — making your makeup more resistant to being worn off over the course of the day. As a final note, if you want to wear lipstick/gloss, I’d recommend bringing it with you and applying it after you’ve taken your mask off — at best, it may stay in place under your mask but it’ll probably feel pretty gross all the while. Save yourself the stress and just bring it along with you!

And there you have it! A simple, easy, six-step makeup look that will keep looking fresh, even if you have to wear a mask all day. The feeling of taking off your mask and having NO idea how messed up your makeup looks underneath is the worst — but with this makeup look, you can avoid the stress altogether. Even if it does get a little damaged after long-term mask wear, it’s simple enough that the difference won’t be noticeable. As well, after step three its more a less up to you how you want to finish the look — so while I often pair my natural every-day eye makeup to achieve a natural look, you can still go all-out on the eyes for something more bold — or go no makeup on the eyes, if that’s what you love. No matter what look you’re going for — this tutorial leaves your options open!

I hope you guys are having a good wrap-up to this summer season! I can’t believe we’re so close to September, but I adore fall, so I’m not mad. I can’t wait for fall to get into full-swing, after all, I’ve been needing a bit of change lately. August has me feeling super burnt out, which is pretty fair considering what a rollercoaster this year has been. I’m hoping to be able to shake things up this September and get back on track for all my goals for 2020!

Much love,

Meredith

Kylie Cosmetics Black Friday Haul!

Hey everyone!

Surprise! It’s me, back again with another Saturday post. I’ve had so many ideas and so much stuff to share lately, it’s been hard fitting it all into my regular posting schedule — so I figured I’d throw in a couple extra posts on Saturdays as needed to ensure I’m sharing all the content I can with you in a timely matter! (After all, it would be a little pointless to delay holiday posts until after the holidays).

As a general rule for myself, I try to avoid getting sucked into big sale holidays like Black Friday and Boxing Day. Unless I have something specific I’ve been needing that just happens to make a great deal around these times, I try not to do any shopping. I know myself, and I know how easily I can get sucked into buying things I don’t need (I really do love a little retail therapy) and these sales only fuel my bad habits because it’s fine if it’s cheap, right? (Wrong! For me at least. I end up spending so much more money than I probably would have otherwise and also sometimes end up buying things I regret.)

To implement a little self-control, I decided to only hit up one Black Friday sale this year — but it was a brand I’ve been dying to try a little more of. Ever since my first Kylie Cosmetics Haul, I’ve been itching to get my hands on a couple more products. Not only did I absolutely adore the lip products I tried, I’ve since heard fantastic things about some of her other products — specifically her blushes and highlighters. Since I didn’t get a chance to try either out the first time around, I really wanted to get the chance to give them a shot — so why not have it be on the biggest sale day of the year?

In total, I purchased two Kylighters, two glosses, two lip kits, a blush and her limited-edition Holiday Red Kyliner liquid liner pen. Since all lip products were 40% off, and all face products discounted 30%, the damage wasn’t even that bad. They’ve finally arrived, and I’m so excited to share my results with you all! So, without further ado, lets get into it!

Bare | Velvet Lip Kit

I was a little nervous trying out this colour — nude shades aren’t usually that flattering on me. However, I actually think I may have found the perfect one. I’ve never bought true nude shades — only light pinks — as the brown tones can appear too dark on me and rarely match my skin tone. However, this shade came highly recommended and the pics were STUNNING — so I gave it a go. This nude isn’t totally brown — it has enough pinky undertones that it actually looks incredibly flattering and natural. I also love the velvet lip kits as they aren’t totally matte, they give a pretty similar effect without being too flat or dry. I was a little worried about trying this shade, but I’m super glad I did! It’s so cute, and I can already tell it’s going to become a staple in my lipstick collection.

Harmony | Velvet Lip Kit

I was a little nervous to try out this shade as well, to be honest. I’m not great at determining how lipstick colours will look on me based on online photos — especially since I don’t wear lipstick often. Gloss is a whole other story — I wear it all the time, so I find it a LOT easier to figure out which shades will work. I decided to give this shade a go anyway — some of the pictures made it look VERY coral toned, which often doesn’t suit me, but the review photos made it look a lot less so. I’m glad I gave it a go — it actually turned out to be just about the perfect shade of pink! It looks pretty natural, while still giving a great pop of colour. I’m not a huge fan of how super bold lipstick colours look on me, but this one is a lot more neutral that I was expecting — and it looks fantastic. 10/10, definitely a fan.

Damn Gina | Gloss

Ugh, okay, I am seriously OBSESSED with this gloss. I knew from the moment I saw it that it would be perfect for me. It’s glittery, pink, and glossy — basically it checks everything I love. I knew this one would be a safe bet for me, but I am truly blown away by how show-stoppingly GORGEOUS it is. A light coat adds the perfect level of soft, glittery glow — but a heavier coat seriously turns this into the near-metallic, glittery gloss of your wildest dreams. The colour is perfect too, and I’d be willing to bet it would look flattering on practically everyone. If you’ve been on the lookout for a new glittery gloss lately, definitely be sure to check this one out.

Posie K | Gloss

The first time I ever tried a product from Kylie Cosmetics was years back, when her first line of lip kits came out. My best friend had purchased some of the kits and let me test them out before I decided if I wanted to buy some for myself — at the time, I was OBSESSED with the Posie K Lip Kit and really wanted to get one for myself. However, matte lipstick has never been the most flattering on me, and all the shades turned out surprisingly dark compared to how they had looked online. I ended up holding off on trying any more Kylie Cosmetics until my original haul just earlier this year. When I saw that Kylie had since come out with a gloss version of her original Posie K Kit, I knew I had to try it. While I haven’t had the opportunity to test it out yet this week, I already know I won’t be disappointed — not only is gloss a lot more flattering on me, but just look at how cute this colour is! I already can’t wait to test it out.

Cotton Candy Cream | Kylighter

I decided to branch out this haul and try something new — the Kylie Cosmetic cheek products! I honestly NEVER branch out with highlighters — I have my one staple that I’ve used daily for literally years now and it’ll always be my favourite. However, I really felt that I’ve been wanting to add more to my collection, and I’ve heard fantastic things about Kylie’s highlighter line. I was honestly a little nervous when I swatched this product — it honestly didn’t swatch well at all, and barely showed up. However, when I tested it out for real, I was beyond impressed. I’m not sure what it was about using my fingers to swatch versus using a brush, but this highlighter is EVERYTHING. It’s super shiny, bright, and just all around beautiful. It’s a lovely shade of gold that gives a sun-kissed look without looking fake or plain glittery — it really gives that “glow from within” look I love. Needless to say, I’m impressed. I’m pretty sold on these products now, and I’m totally going to be trying more Kylighters in the future.

Princess Please | Kylighter

I was SO excited to try this highlighter out. It was honestly one of the products in my box I was most excited for. It was a bit of a step out of my comfort zone, as my everyday highlighter is a warm rose gold, and this shade is a very cool toned pink. However, I was obsessed with this highlighter from the moment I saw it — I don’t even know why, but I was just drawn to it. Similarly to the Cotton Candy Cream highlighter, it didn’t swatch well — but worked wonders when I applied it normally with my makeup. The colour is SO CUTE — it gives a really bright, cool glow. It’s a colour I’ve really never tried before, so I was surprised at how natural it looked and how well it blended (both things I was nervous about before trying this shade). However, it looked amazing — it would look incredibly natural and flattering on paler skin tones, while giving a bolder, icy look on tanned and darker toned skin.

Pink Power | Blush

I haven’t gotten the chance to test out this blush properly yet — but I’m already pretty excited about it. I’ve been using the same blush shade since forever now — and while I do adore it, I thought it would be fun to branch out. This colour is definitely very new for me, and I’ve never worn anything like it before. That being said, it looks SO cute, and I feel it would look adorable on my regular skin tone — and bold and new with a tan.

Holiday Red | Kyliner Liquid Liner Pen

When I saw this product in Kylie’s holiday collection, I was interested immediately. I’ve never seen a red liquid liner before, so I didn’t really know what to expect — so I figured I just HAD to see for myself. I’m pretty impressed by this liner — it’s a LOT more pigmented that I expected, which is great (if you’re going to do red liner, may as well go all out, right?). As well, even though I’m not a huge fan of felt-tip pen liners, this pen is incredibly precise. I haven’t gotten a chance to use it yet — it’s hard to fit in red liner to an everyday look — but I can’t wait to get the chance to. I have a feeling I won’t be disappointed by it.

And that’s it for my little Black Friday haul! I hope you all enjoyed this post as much as I enjoyed writing it — I’ve been dying to try more from Kylie Cosmetics for so long now and I’m absolutely obsessed with all the products I purchased during this sale. If you’ve tried (or are hoping to try) any of these products, drop a comment below! As well, if you purchased anything from Kylie this Black Friday, I’d love to hear what you picked out!

I hope you guys are all having a fantastic week — holiday season is in full swing now, and we only have 4 (!!!) days until Christmas and just over a week until 2020! I have so much exciting content to share with you all over the next couple of weeks, so be sure to stay tuned. I’m currently on a plane right now, about to kick off my winter holidays — so stay tuned for upcoming posts about my trip in the new year! As well, tomorrow I have a full round up post highlighting all of my favourite (and least favourite) products I’ve tried this year, and a couple of other 2019 wrap-up and 2020 posts coming up over the next week! I hope you guys are all ending this year on a high note (or gearing up to have a fantastic 2020 if not!).

As a side note before I go, for those of you who follow me on twitter, you’ll know my big blogging goal for 2019 was to reach 5k views on my blog. When I set this goal, it was a huge stretch — just two months ago I just sitting just under 3k views. However, both because of how much effort I’ve been putting in to my blog since then, as well as all your support, I’ve now reached my goal! I know it’s still small, but all of your support so far has meant so much to me. I’ve set a new, possibly crazier goal for 2020 — I’m hoping to achieve 15k views for the year, putting me at 20k total. It might be a stretch, but I’ll never know unless I try, right? If you have any goals you’ve already set for your blogging this upcoming year, I’d love to hear them as well! Hopefully we can all push each other and support each other and achieve everything, and make 2020 our best years yet!

Xo,

Meredith

GLOSSIER HAUL: Love It or Leave It?

Me, Sporting a Full Face of Glossier Products

Hey y’all!

I’m back with another review for you guys! As some of you know, I’m leaving next week on a backpacking trip across South East Asia (which I’m very excited to share with you all!) and have been facing the challenge of fitting everything I need for a month in one backpack. As someone who is admittedly rather high-maintenance, packing light has never been my forte. Furthermore, there’s the whole issue of a full face of makeup likely not holding up super well to the climate where I’m travelling. This gave me the perfect opportunity to try out some of Glossier’s products I’ve been eyeing, as they are usually cream based (no brushes required) as well as supposedly super light. I’ve purchased from Glossier once before, and have a Tuesday Favourites coming up detailing how much I love their Balm DotCom lip products, so I’ve been looking for a while to try out some more of their products.

Glossier Perfecting Skin Tint
Glossier Perfecting Skin Tint Shade #G8

Soooo, the first product I tried was the Glossier Perfecting Skin Tint. I had some hesitations with this one as I’ve seen a lot of reviews saying it made no difference in their skin, as well as having the consistency of water. However, adding this to a set with the concealer (which I was going to purchase anyway) came for $44 with the concealer being $22, and it seemed smart to pack something super light for my trip. The moment I poured it out of the bottle though, I could tell the reviews were correct — I usually only use tinted moisturizer, which is light coverage, but this stuff really redefines light coverage. On the bright side, it blended into my skin super easily — but whether that was because it’s a good product or because it simply made no changes to my skin at all is up for debate. I’m still going to bring it on my trip and will be sure to update y’all if I change my mind, but for now the verdict is unfortunately: leave it.

Glosser Stretch Concealer
Glossier Stretch Concealer Shade #G8

Okay, so I have a bit of a mixed review on this one. On the plus side, its super compact and light, and doesn’t seem to have creased since I applied it. However, at the same time, I felt when I was applying it that it didn’t really conceal my dark circles. I notoriously have permanent bags and circles under my eyes, which is one of the things I’m most insecure about and use makeup for the most. However, afterwards when I was taking photos for this post, it seemed to have done a better than I first thought. I guess I’m just gonna have to see how it holds up to day to day life, and if y’all are interested I can share updates later on. However, the verdict for now is: we’ll have to wait and see.

Glossier Cloud Paint
Glossier Cloud Paint in Shade Beam

Okay, I won’t lie, this one really took me by surprise. When I first opened it, I was super spooked by how bright the colour was, and I figured there was absolutely no way this would look good on me, or anyone, really. However, after blending it into my skin, it actually turned from less of a bright peach and more into a natural pink flush. I’ve never used cream blush before, and we’ll see how it goes over the next month, but honestly? I could be down to use this product in my daily routine when I’m back. It looked SO natural and dewey, it was honestly unreal. Plus, it was only $22! Verdict: LOVE IT.

Glossier Haloscope Highlighter
Glossier Haloscope Highlighter in Shade Quartz

I’ve been seeing ads for this product forever and I’ve always been super curious. In reviews of Glossier products I’ve seen before, people often rave about this stuff, but note that it gives a natural finish (versus a blinding highlight). However, since I’m used to Vancouver weather and am probably going to melt in Asia, I figured that would be more than enough as I’m sure I’ll already have that #naturalglow going for me (aka sweat). This stuff didn’t 100% blow me away like the blush did, but it does have a lovely natural finish and I think I’m really going to love the simplicity of applying it. It still feels a little oily on my skin a few hours later, if that’s the best way to describe it, but it is rather balmy with a built-in moisturizer so it’s not quite greasy (if that makes any sense). So, the verdict for now is: Love It!

Glossier Lidstar Duo
Glossier Lidstar Duo in Shades Cub and Slip

Last but not least, we have Glossier’s Liquid Eyeshadows, called Lidstar. I was pretty excited to try these as a) I haven’t really tried liquid eyeshadow before and b) the simplicity of being able to wear eyeshadow without using a brush sounded amazing. I’ve seen reviews before where people were disappointed with the pigmentation of the product, however I think they expected it to look like a foil, which I didn’t expect. These eyeshadows, amazingly, feel super soft on your skin, as well as blend out like a dream. The only issue I had was that they kind of seemed to crease a little when I first applied them; but that could have just been because I applied them too soon after my primer. I blended it out with my finger quickly and they haven’t creased at all since. They are super light in colour, however I feel that makes them perfect for an everyday eyeshadow as I don’t love wearing heavy eyeshadow in the day but often have trouble finding light colours that look good. Honestly, I’m probably gonna invest in more of these in the future. So, overall, the verdict is: LOVE IT!

So, there you have it! After I completed the look, I finished up with a couple of my normal non-Glossier products — mascara, brow pencil and brow mascara, as well as bronzer. I will say, I was a little disappointed Glossier didn’t carry their own bronzer, as liquid/cream bronzer would have been a godsend on my travels. However, I’m pretty impressed by the products I did try and can’t wait to rock them in my future travel blogs! You can see how the finished look turned out in the photo below, but I’m pretty satisfied with it. If you’re interested in trying out Glossier’s products, be sure to do so here!

Much Love,

Meredith